

  |  | ||
![]()
When printing on custom size paper, specify the paper size using the control panel or printer driver.
Custom size paper selected using the printer driver overrides that selected using the control panel. Do not make settings using the control panel if you have already made settings using the printer driver.
Paper sizes between 90 - 216 mm (3.54 - 8.5 inch) in width and 148 - 356 mm (5.83 - 14 inch) in length can be loaded in the tray 1.
The printer cannot print from applications that do not support custom size paper.
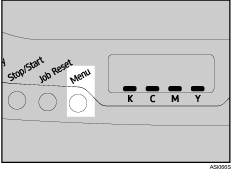
Press the [Menu] key.

Press the [![]() ] or [
] or [![]() ] key to display [Paper Input], and then press the [#Enter] key.
] key to display [Paper Input], and then press the [#Enter] key.
| Menu: Paper Input |
Press the [![]() ] or [
] or [![]() ] key to display [Paper Size], and then press the [#Enter] key.
] key to display [Paper Size], and then press the [#Enter] key.
| Paper Input: Paper Size |
Press the [![]() ] or [
] or [![]() ] key to display [Tray 1], and then press the [#Enter] key.
] key to display [Tray 1], and then press the [#Enter] key.
| Paper Size: Tray 1 |
For example, [Tray 1] is selected for Tray 1 as shown.
Press the [![]() ] or [
] or [![]() ] key to display [Tray 1 Size: Custom Size], and then press the [#Enter] key.
] key to display [Tray 1 Size: Custom Size], and then press the [#Enter] key.
| Tray 1 Size: Custom Size |
Press the [![]() ] or [
] or [![]() ] key to select a unit, and then press the [#Enter] key.
] key to select a unit, and then press the [#Enter] key.
| Custom Size: mm |
Press the [![]() ] or [
] or [![]() ] key to enter the horizontal value, and then press the [#Enter] key.
] key to enter the horizontal value, and then press the [#Enter] key.
| Custom Size: Horiz. 216.0 mm |
Press the [![]() ] or [
] or [![]() ] key to enter the vertical value, and then press the [#Enter] key.
] key to enter the vertical value, and then press the [#Enter] key.
| Custom Size: Vert. 356.0 mm |
Press the [Menu] key.
The initial screen appears.