Selecting Original Type
This section explains how to select an original type.
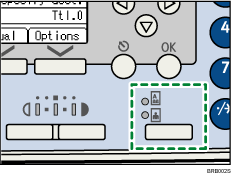
Select an original type using the [Color Scan] key in combination with the [Original] key.
Specify the details of the selected original type using [Original Type Setting] under [Scanner Features]. For details about [Original Type Setting], see "Scanner Features".
The following table explains the [Color Scan] and [Original] keys combinations and their relationship with [Original Type Setting].
Default settings are shown in bold type.
[Color Scan] key |
[Original] key |
[Original Type Setting] |
|---|---|---|
On |
Text |
Type 1(Colour: Text)
|
On |
Photo |
Type 2(Colour: Photo)
|
Off |
Text |
Type 3(B&W: Text)
|
Off |
Photo |
Type 4(B&W: Photo)
|
![]() Press the [Color Scan] key to switch between on and off.
Press the [Color Scan] key to switch between on and off.
The [Color Scan] key is on when the indicator is lit, and off when the indicator is unlit.
![]() Press the [Original] key to select text or photo.
Press the [Original] key to select text or photo.

The indicator of the selected original type lights up.
![]()
To scan originals in gray scale, you must first select [Scanner Features], [Original Type], and then [Type 3(B&W: Text)] or [Type 4(B&W: Photo)], select [Gray Scale]. Then, to scan your originals in gray scale, select the original type that you set to [Gray Scale]. For details about [Original Type], see "Scanner Features".
If images scanned in gray scale are not clear enough, you can rescan them by selecting [Type 1(Colour: Text)] or [Type 2(Colour: Photo)].

