E-mail Screen
This section explains the screen layout when sending scan files by e-mail.
Main Screen

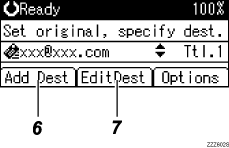
When a destination is entered manually

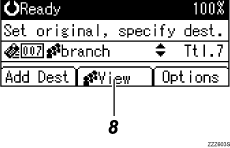
When a group is selected for destination

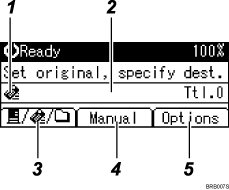
E-mail icon
Indicates that the E-mail screen is displayed.
Destination field
Displays a selected destination. If multiple destinations are selected, press the [
 ] or [
 ] key to display the destinations in the order they were selected. To check the selected destination, press the [Check Destination] key.
E-mail
 / Scan to Folder
  / Network Delivery Scanner
Press to switch between screens. You can also use this key to switch between the E-mail and Scan to Folder functions when sending the same file to both e-mail and Scan to Folder destinations at the same time.
[Manual]
When specifying a destination that is not registered, press [Manual], and then enter the e-mail address of the destination using the Quick Dial keys.
[Options]
Press to make the scan settings and specify formats of files you want to send.
[Add Dest]
When selecting multiple destinations after a manual entry of an e-mail address, press [Add Dest], and then enter the e-mail address of the destination.
[EditDest]
When changing an e-mail address that has been entered, press [EditDest], and then enter the new e-mail address.
[View]
Press to check the addresses registered in a group.

