
| |||
When replacing the fusing unit, clean it simultaneously.
![]()
The fusing unit becomes very hot. When installing a new fusing unit, turn off the printer and wait at least an hour after power off before replacing parts. Not allowing the printer to cool may result in burns.
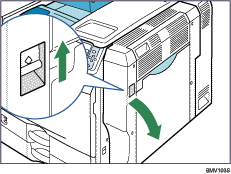
Turn off the printer and unplug the power cable.
Push up the lever on the right side, and open the printer's right cover carefully.
Loosen the screws to remove the brackets from both sides of the fusing unit.
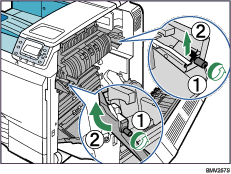
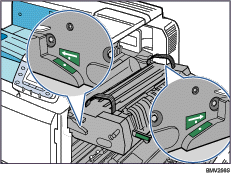
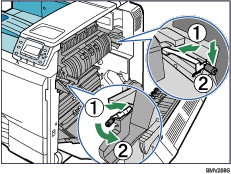
Raise the C1 levers on both sides.
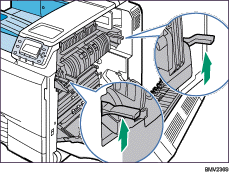
Holding the C2 levers, pull out the fusing unit.

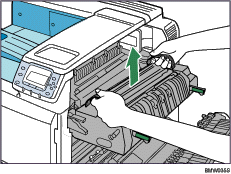
While holding the handles, slowly pull up the fusing unit.
Clean the lens inside of the printer after pulling up the fusing unit.
For details about the cleaning procedure, see the replacement guide provided with the fusing unit.
Take the new fusing unit out of the bag.
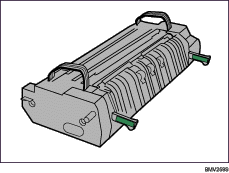
Set the fusing unit on the guide plate, making sure to align the green marks on the fusing unit and the printer.
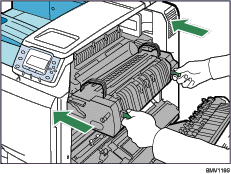
Push the fusing unit back into the printer carefully until it completely stops.
Push down the C1 levers on both sides.
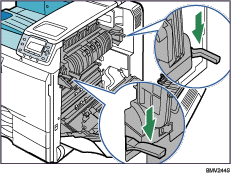
Reattach the brackets to both sides of the fusing unit and tighten the screws.
![]()
This completes fusing unit replacement. Leave the right cover open, replace the transfer roller and the dustproof filter as shown below.
| Copyright (C) 2008 |