Replacing the Transfer Unit
![]()
The inside of this printer becomes very hot. Do not touch parts labeled "
 " (indicating a hot surface). Touching these parts will result in burns.
![]()
If the transfer unit is not installed correctly, a message appears on the control panel. Re-install the transfer unit. If installation fails three times in a row, "SC443" appears on the control panel. If this message appears, contact your sales or service representative.
![]() Turn off the printer and unplug the power cable.
Turn off the printer and unplug the power cable.
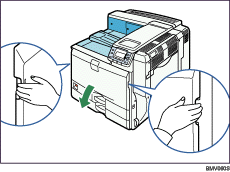
![]() Holding the left and right side grips, carefully open the front cover.
Holding the left and right side grips, carefully open the front cover.
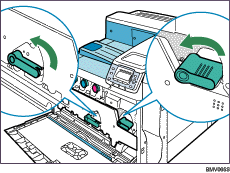
![]() Turn the two green levers counterclockwise.
Turn the two green levers counterclockwise.
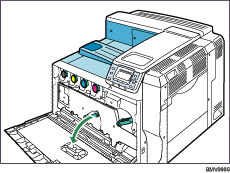
![]() Pulling the handle, slowly open the inner cover.
Pulling the handle, slowly open the inner cover.
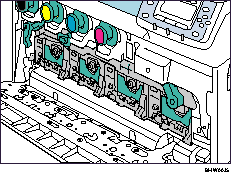
The transfer unit is installed as shown below.
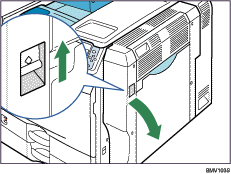
![]() Push up the lever on the right side, and open the printer's right cover carefully.
Push up the lever on the right side, and open the printer's right cover carefully.
Opening the right cover is necessary for transfer unit replacement.
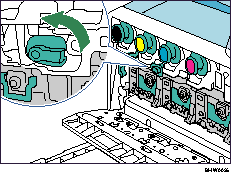
![]() Turn the green lever located on the left side of the transfer unit counterclockwise.
Turn the green lever located on the left side of the transfer unit counterclockwise.
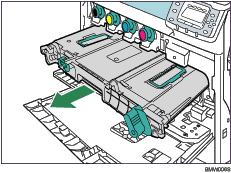
![]() Holding the green grip in the center of the transfer unit, pull the unit out until the handles on the top surface become completely visible.
Holding the green grip in the center of the transfer unit, pull the unit out until the handles on the top surface become completely visible.
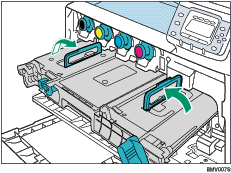
![]() Lift the handles on the top surface.
Lift the handles on the top surface.
![]() Holding the handles, slowly pull out the transfer unit.
Holding the handles, slowly pull out the transfer unit.
![]() Take the new transfer unit out of the bag and remove the cover from the transfer unit.
Take the new transfer unit out of the bag and remove the cover from the transfer unit.
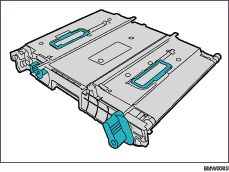
![]() Lift the handles on the top surface.
Lift the handles on the top surface.
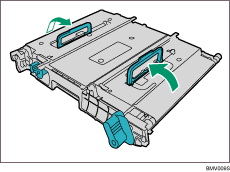
![]() Slide the transfer unit along the guide rails into the printer until the upper handles touch the printer body.
Slide the transfer unit along the guide rails into the printer until the upper handles touch the printer body.
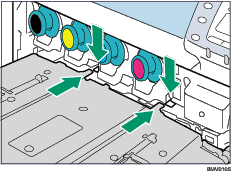
![]() Lower the handles, and then push the front of the transfer unit to fully insert it into the printer.
Lower the handles, and then push the front of the transfer unit to fully insert it into the printer.
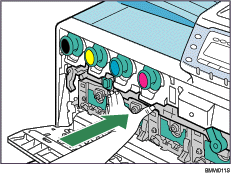
![]() Turn the green lever on the left side of the transfer unit clockwise.
Turn the green lever on the left side of the transfer unit clockwise.
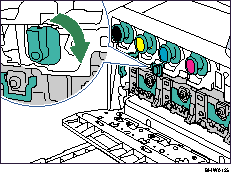
![]() Pressing both sides, firmly close the inner cover.
Pressing both sides, firmly close the inner cover.
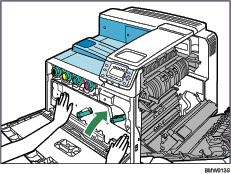
![]() Turn the green levers clockwise.
Turn the green levers clockwise.
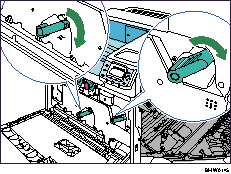
![]() Carefully close the right cover.
Carefully close the right cover.
![]() Carefully close the front cover.
Carefully close the front cover.
![]() Plug in the power cable and turn on the printer.
Plug in the power cable and turn on the printer.

