

  |  | ||
![]()
When printing on custom size paper, specify the paper size using the control panel and printer driver.
When printing with a printer driver other than the RPCS printer driver, you must configure the settings using control panel.
The following is the range of paper sizes that can be loaded in each type of the paper trays:
Tray 1: 139.7 - 216 mm (5.5 - 8.5 in.) in width and 139.7 - 356 mm (5.5 - 14.01 in.) in length.
Optional Paper Feed Unit (Tray 2, Tray 3): 139.7 - 216 mm (5.5 - 8.5 in.) in width and 160 - 356 mm (6.3 - 14.01 in.) in length.
The printer cannot print from applications that do not support custom size paper.
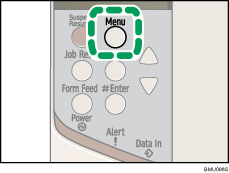
Press the [Menu] key.

The [Menu] screen appears.
Press the [![]() ] or [
] or [![]() ] key to display [Paper Input], and then press the [
] key to display [Paper Input], and then press the [![]() Enter] key.
Enter] key.

Press the [![]() ] or [
] or [![]() ] key to display [Tray Paper Size], and then press the [
] key to display [Tray Paper Size], and then press the [![]() Enter] key.
Enter] key.
Press the [![]() ] or [
] or [![]() ] key to display the target paper tray, and then press the [
] key to display the target paper tray, and then press the [![]() Enter] key.
Enter] key.

Press the [![]() ] or [
] or [![]() ] key to display [Custom Size], and then press the [
] key to display [Custom Size], and then press the [![]() Enter] key.
Enter] key.
Press the [![]() ] or [
] or [![]() ] key to set horizontal value, and then press the [
] key to set horizontal value, and then press the [![]() Enter] key.
Enter] key.
![]()

![]()

By pressing the [![]() ] or [
] or [![]() ] key, the value increases or decreases by 0.1 mm (0.01 inch).
] key, the value increases or decreases by 0.1 mm (0.01 inch).
By pressing and holding the [![]() ] or [
] or [![]() ] key, the value varies by 1 mm (0.1 inch).
] key, the value varies by 1 mm (0.1 inch).
The screen for entering the length appears.
Press the [![]() ] or [
] or [![]() ] key to set the vertical value, and then press the [
] key to set the vertical value, and then press the [![]() Enter] key.
Enter] key.
![]()

![]()

After about two seconds, the display returns to the menu.
Press the [Menu] key.
The initial screen appears.