


  |  | ||
![]()
|
![]()
|
![]()
Store print cartridges in a cool dark place.
The actual number of printed pages varies depending on image volume and density, number of pages printed at a time, paper type and size, and environmental conditions such as temperature and humidity. Toner quality degrades over time. Early replacement of print cartridges might be necessary. Therefore, we recommend you always keep new print cartridges ready.
For good print quality, we strongly advise you use genuine print cartridges only.
The supplier shall not be responsible for any damage or expense that might result from the use of parts other than genuine parts from the supplier with your office products.
Messages on the screen
Replace the indicated print cartridge when any of the following messages appear on the screen:
"Life End K Toner Cartridge"
"Life End M Toner Cartridge"
"Life End C Toner Cartridge"
"Life End Y Toner Cartridge"
Prepare the indicated print cartridge when any of the following messages appear on the screen:
"Near End K Toner"
"Near End M Toner"
"Near End C Toner"
"Near End Y Toner"
![]()
Do not allow paper clips, staples, or other small objects to fall inside the machine.
Do not expose the print cartridge without its cover to direct sunlight for a long time.
Do not touch the print cartridge's photo conductor unit.
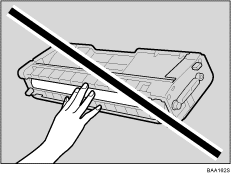
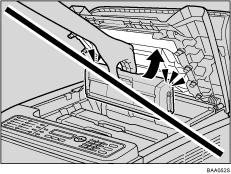
When removing print cartridges, be careful not to touch the Laser Scanning Unit on the underside of the upper cover (the white area in the illustration below).
If cyan, magenta, or yellow toner runs out, you can print in black and white using just the black toner. Change the color mode setting to Black and White using the machine's driver.
If black toner runs out, you cannot print in black and white or color until the black print cartridge is replaced.
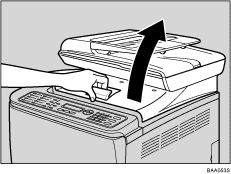
Pull up the lever on the top cover, and then carefully raise the top cover.
Make sure that the exposure glass cover or ADF is closed.
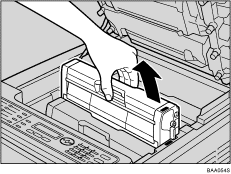
Tilt the print cartridge forward and pull it out.
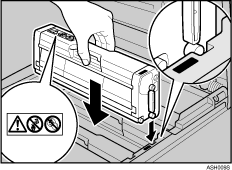
From the rear, the print cartridges are installed in the order of cyan (C), magenta (M), yellow (Y), and black (K).
Do not shake the removed print cartridge. Doing so can cause remaining toner to leak.
Place the old print cartridge on paper or similar material to avoid dirtying your workspace.
The toner color is indicated by the label on each print cartridge.
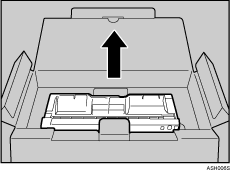
Take the new print cartridge out of the box, and then take it out of the plastic bag.
Hold the print cartridge and shake it from side to side five or six times.
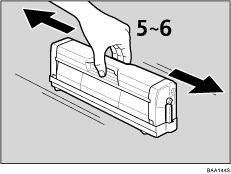
Even distribution of toner within the bottle improves print quality.
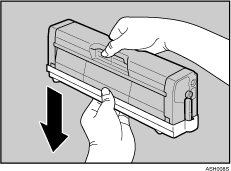
Remove the cover from the print cartridge.
Check that the toner color and location correspond, and carefully insert the print cartridge vertically.
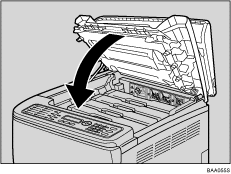
Using both hands, hold the center of the top cover and close the cover carefully. Be careful not to trap your fingers.
After closing the top cover, wait until the initial screen is displayed.
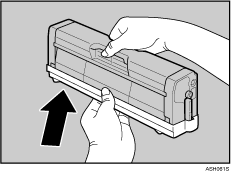
Put the cover that you removed in step 5. on the old print cartridge. Then, put the old print cartridge into the bag, and then put it into the box.
![]()
Make sure to cover the old print cartridge with the protective cover for recycling and environmental purposes.
Comply with the print cartridge Recycling Program, whereby used print cartridges are collected for processing. For details, ask your sales or service representative.