

  |  | ||
Make the following network settings according to the network interface you are using.You can use SmartDeviceMonitor for Admin or a Web browser to make IP address-related settings in a TCP/IP-capable environment.
![]()
Configure the printer for the network using the control panel.
The following table shows the control panel settings and their default values. These items appear in the [Host Interface] menu.
Setting Name |
Value |
|---|---|
IPv4 Settings |
|
IPv6 Settings |
Stateless Sett.: Active |
Frame Type (NW) |
Auto Select |
Active Protocol |
|
Ethernet Speed |
Auto Select |
LAN Type |
Ethernet |
![]()
If DHCP is in use, the IP address, subnet mask, and gateway address are all set automatically.
Make this setting only when it is necessary. See Software Guide.
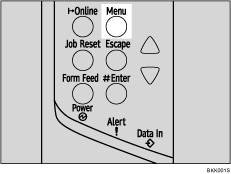
Press the [Menu] key.

The [Menu] screen appears.
Press the [![]() ] or [
] or [![]() ] key to display [Host Interface], and then press the [
] key to display [Host Interface], and then press the [![]() Enter] key.
Enter] key.

Press the [![]() ] or [
] or [![]() ] key to display [Network Setup], and then press the [
] key to display [Network Setup], and then press the [![]() Enter] key.
Enter] key.

Press the [![]() ] or [
] or [![]() ] key to display [Active Protocol], and then press the [
] key to display [Active Protocol], and then press the [![]() Enter] key.
Enter] key.

Press the [![]() ] or [
] or [![]() ] key to set the network protocol, and then press the [
] key to set the network protocol, and then press the [![]() Enter] key.
Enter] key.

Press the [![]() ] or [
] or [![]() ] key to display [Active] or [Not Active], and then press the [
] key to display [Active] or [Not Active], and then press the [![]() Enter] key.
Enter] key.

Set other protocols you need to set in the same way.
Select [Not Active] for unused protocols.
Enable IPv4 to use the Pure IPv4 environment of NetWare 5/5.1, NetWare 6/6.5.
Press the [Escape] key until the screen returns to the [Network Setup] menu.

If you use IPv4, assign the IPv4 address to the printer. Press the [![]() ] or [
] or [![]() ] key to display [IPv4 Settings], and then press the [
] key to display [IPv4 Settings], and then press the [![]() Enter] key.
Enter] key.

To get the IP address for the printer, contact your network administrator.
To specify the IP Address, Press the [![]() ] or [
] or [![]() ] key to display [IPv4 Address], and then press the [
] key to display [IPv4 Address], and then press the [![]() Enter] key.
Enter] key.

If you use IPv4, also assign subnet mask and gateway address.
Press the [![]() ] or [
] or [![]() ] key to enter the address, and then press the [
] key to enter the address, and then press the [![]() Enter] key.
Enter] key.

Press the [![]() ] or [
] or [![]() ] key to enter the left most entry field of the address. After entering the left field, press the [
] key to enter the left most entry field of the address. After entering the left field, press the [![]() Enter] key, and then you can enter the next field. After completing to enter in the all fields, press the [
Enter] key, and then you can enter the next field. After completing to enter in the all fields, press the [![]() Enter] key.
Enter] key.
Do not set "11.22.33.44" as the IP address.
If you use IPv4, use this method of assigning IPv4 address to assign subnet mask and gateway address.
Press the [![]() ] or [
] or [![]() ] key to select [Subnet mask] or [Gateway Address], and then press the [
] key to select [Subnet mask] or [Gateway Address], and then press the [![]() Enter] key.
Enter] key.
Press the [Online] key.
The initial screen appears.
Print a configuration page to confirm the settings made.
![]()
"Printing the Test Page", Quick Installation Guide.