
| |||
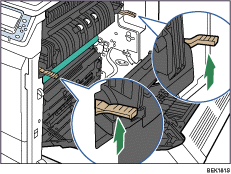
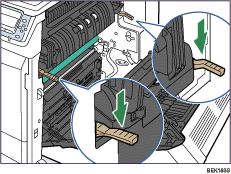
Raise the brown levers on both sides.
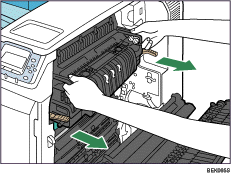
Holding the fusing unit by the handles, slowly pull out the fusing unit until it stops.
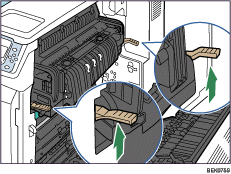
Raise the brown levers on both sides again.
Holding the fusing unit firmly by the handles, pull out the fusing unit completely.
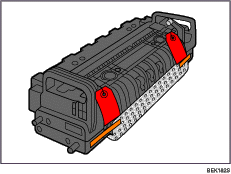
Take the new fusing unit out of the bag.
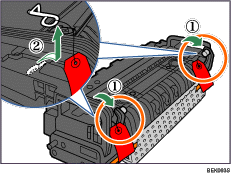
Pull down the levers on both sides of the unit (![]() ), turn the pins with a red tag toward you, and then pull them out (
), turn the pins with a red tag toward you, and then pull them out (![]() ).
).
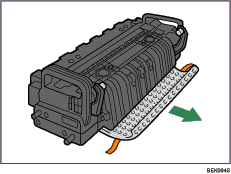
Remove the tapes from both sides and take out the protective material.
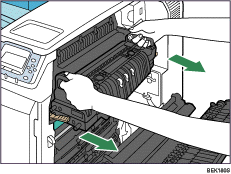
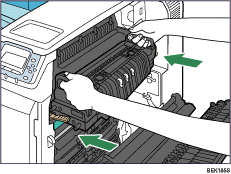
Holding the fusing unit by the handles, carefully push the fusing unit into the printer completely.
Lower the brown levers back in place.
Carefully close the right cover.
Turn on the printer.
![]()
The first time you turn on the printer after installation or after replacing the fusing unit, it will make several noises. This is due to the fusing unit initializing and is perfectly normal.
Confirm that the "Replace Maintenance Kit B." message on the display has cleared. Replacing the Maintenance Kit B is finished.
| Copyright (C) 2007 |