


  |  | ||
![]()
Do not incinerate the transfer unit. Toner dust might ignite when exposed to an open flame. Dispose of the used transfer unit in accordance with local regulations.
![]()
If you attempt to start printing when the transfer unit is not installed correctly, the message "SC440" may appear on the display. If this happens, contact your sales or service representative.
Turn off the printer and unplug the power cord.
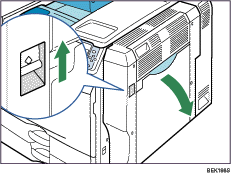
Push up the lever on the right side, and open the printer's right cover carefully.
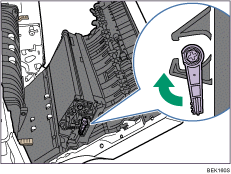
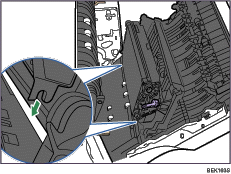
Raise the purple lever inside the right cover.
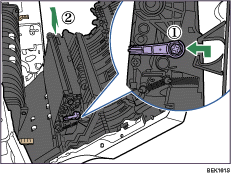
Holding both sides of the unit, lift the unit slightly and bring it towards the printer to unhook it from the right cover (![]() ), and then take it out completely (
), and then take it out completely (![]() ). Put the used transfer unit on paper or similar material to avoid dirtying your workspace.
). Put the used transfer unit on paper or similar material to avoid dirtying your workspace.
Be careful not to tilt or shake the unit. Otherwise, toner might scatter.
Take the new transfer unit out of the box, and remove the plastic bag.
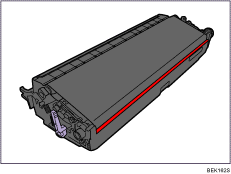
Remove the desiccant from the transfer unit.
Align the new transfer unit with the shaft.
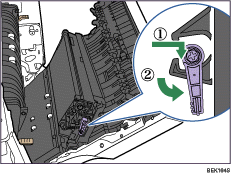
Return the purple lever back in place (![]() ), and then lock the transfer unit (
), and then lock the transfer unit (![]() ).
).
Put the old transfer unit into the bag that the new transfer unit was in.
This completes transfer unit replacement. Leave the right cover open, and replace the fusing unit as shown below.
![]()
If you cannot return the purple lever to its original position, raise the purple lever and remove the transfer unit. After that, try to install the transfer unit again.