


  |  | ||
![]()
Do not touch the inside of the controller board compartment. It may cause a machine malfunction or a burn.
![]()
Before beginning work, ground yourself by touching something metal to discharge any static electricity. Static electricity can damage the hard disk.
Do not subject the hard disk to physical shocks.
When installing the SDRAM module, hard disk, and wireless LAN interface board together, install them in the following order: SDRAM module, hard disk, wireless LAN board. If the wireless LAN interface board is already installed, remove it before installing the hard disk.
Install the hard disk carefully if the SDRAM module is already installed. If the hard disk comes in contact with the SDRAM module, the SDRAM module may become damaged.
Before using the new hard disk, you must configure settings in the printer driver.
Check the contents of the package.
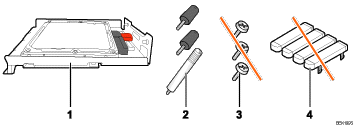
Hard Disk
Three Screws
Screws for Other Models
Key Tops
Turn the printer off and unplug the power cord.
Remove the two screws securing the controller board.
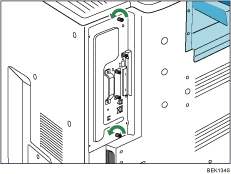
The removed screws will be used to secure the controller board again later.
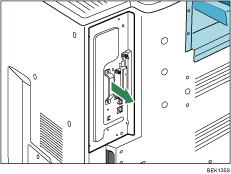
Holding the handle, carefully pull out the controller board.
Slide the controller board completely out and place it on a flat surface such as a table.
Install the hard disk in the indicated position.
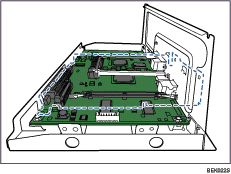
Install the hard disk carefully if the SDRAM module is already installed. If the hard disk comes in contact with the SDRAM module, the SDRAM module may become damaged.
Fit the hard disk on the connector of the controller board carefully until it stops.
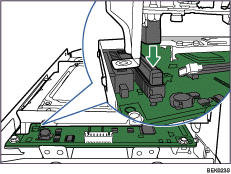
Fasten the two screws clockwise as shown by using a coin, to secure the hard disk.
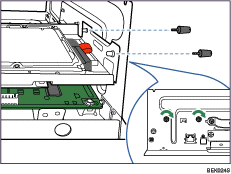
Fasten the screw clockwise as shown by using a coin, to secure the hard disk.
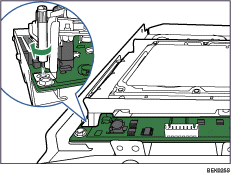
Fit the controller board into the printer, and push it carefully in until it stops.
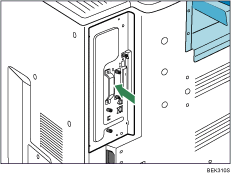
Push it firmly into the printer using the handle. The printer may malfunction if the controller board is not properly installed.
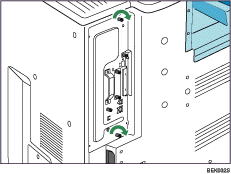
Fasten the controller board to the printer using the two screws.
Plug in the power cord, and then turn on the printer.
When the power is turned on, the hard disk will be formatted automatically.
Print the configuration page to confirm that the hard disk was installed correctly.
![]()
Confirm that the hard disk was correctly installed by printing the configuration page. If it is correctly installed, "Hard Disk Drive" will appear for "Device Connection" on the configuration page.
If the hard disk was not installed properly, repeat the procedure from step 2. If it cannot be installed correctly even after reattempting installation, contact your sales or service representative.
For information on printing the configuration page, see "Test Printing", Quick Installation Guide.
Install the controller board carefully. For details, see "Cautions When Re-installing the Controller Board".