

  |  | ||
To update the printer driver, uninstall the old printer driver before installing the new one.
![]()
The following explanation uses Windows 98 as an example. Procedures under other operating systems may differ.
The Status monitor installed with the current printer driver is uninstalled when the current printer driver is uninstalled.
Registered custom settings are also deleted. To continue using registered custom settings, save them as custom settings files before uninstalling.
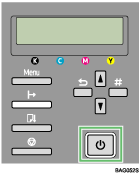
Press the printer's [Power] key to turn the printer off.

On the [Start] menu, point to [Settings], and then click [Printers].
Click the icon of the printer, and then click [Delete] on the [File] menu.
A confirmation message appears.
Click [Yes].
The printer driver is uninstalled.
Double-click [My computer].
On the [View] menu, click [Folder Options...].
Click the [View] tab.
In the [Advanced Settings:] box, click [Do not show hidden files], and then deselect the [Display the full path in title bar] check box.
Click [OK].
On the [Start] menu, point to [Find], and then click [Files or Folders...].
Click the [Name & Location] tab, and then enter a file name in the [Named:] field.
Enter “RCDAD19X.inf” as the INF name.
In the [Look in:] box, select the hard disk on which Windows is installed, and then click [Find Now].
Right-click the file displayed as the search result, and then click [Delete...].
The INF file is uninstalled.
After uninstalling the printer driver, restart Windows.
![]()
For details about storing registered custom settings, see the printer driver Help.
For details about updating the printer driver, contact your sales or service representative.