

  |  | ||
After setting up the hardware and before connecting the printer to a computer, make a test print by printing the configuration page.
Printing the configuration page as a test print primes the print heads and allows you to check that the printer is functional.
You can also use the configuration page to check the printer's configuration and system settings.
![]()
The configuration page is printed on A4 or Letter (8 1/2" × 11") size paper, so load them in the same paper tray.
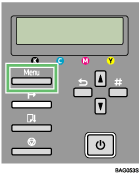
Press the [Menu] key.

Press the [![]() ] or [
] or [![]() ] key to display [List/Test Print], and then press the [#Enter] key.
] key to display [List/Test Print], and then press the [#Enter] key.
| Menu: List/Test Print |
Press the [![]() ] or [
] or [![]() ] key to display [Config. Page], and then press the [#Enter] key.
] key to display [Config. Page], and then press the [#Enter] key.
| List/Test Print: Config. Page |
The configuration page is printed.
The List/Test Print menu screen returns on completion of printing.
Check whether the print-head nozzles are clogged up or not by printing a nozzle check test pattern.
Hold the [Power] key down until the printer shuts down.
If you are connecting the printer to a computer via USB, proceed to Connecting the Computer and Installing the Software (USB Connection).
If you are connecting the printer to a network, proceed to Connecting the Computer and Installing the Software (Network Connection).
![]()
For details about printing a nozzle check test pattern, see Nozzle Check.
For details about the items on the configuration page, see Checking the Printer Status and Settings using the Printer's Control Panel (List/Test Print Menu).