

  |  | ||
This section explains how to forward a received fax to another destination and how to print the fax at the receiving end. You can specify this setting in [RX Settings].
You can only specify one destination.

To specify the forwarding destination, enter fax numbers or an e-mail address. Additionally, you can specify the forwarding destination using the number keys, the Quick Dial keys, or the [Speed Dial] key. You cannot specify the forwarding address by selecting the Group Dial.
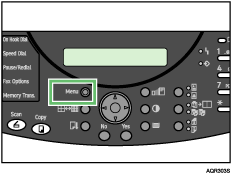
Press the [Menu] key.

The menu screen appears.
Press the [![]() ] or [
] or [![]() ] key to display [RX Settings], and then press the [Yes] key.
] key to display [RX Settings], and then press the [Yes] key.
| RX Settings OK=Yes / or 1-9 |
Press the [![]() ] or [
] or [![]() ] key to display [6 Forwarding], and then press the [Yes] key.
] key to display [6 Forwarding], and then press the [Yes] key.
| 6 Forwarding OK=Yes |
Press the [![]() ] or [
] or [![]() ] key to display [On] or [FW&Print], and then press the [Yes] key.
] key to display [On] or [FW&Print], and then press the [Yes] key.
| *On FW&Print Off |
Specify the destination, and then press the [Yes] key.
[1] |
You can enter the sub-address using up to 50 digits.
The RX Settings screen appears.
Press the [No] key to switch to the initial screen.
To cancel forwarding, press the [Clear/Stop] key. If forwarding is cancelled, the fax sent to the machine is deleted after it is printed.
![]()
The machine deletes the fax after they are forwarded. If [FW&Print] is selected, the fax is deleted after it is forwarded and printed.
A fax with the following additional features cannot be forwarded:
Transfer Request, Polling reception
If [Memory RX] is set to [On] in [RX Settings], faxes cannot be forwarded. Set [Memory RX] to [Off].
If there are faxes waiting to be forwarded when [Forwarding] is set to [Off], those faxes are forwarded.