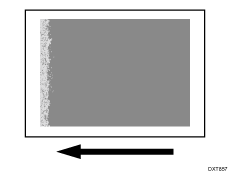
Faint Color at the Leading Edge of the Paper (White Spots)
Insufficient transfer current
Density fluctuation-like faint prints appear.

Excessive transfer current
Small white spots appear.
Cause:
Insufficient transfer current is prone to occur when using thin paper is used.
Excessive transfer current is prone to occur when printing is performed in a high temperature environment.
Solution:
This solution only works when the thickness of the paper is equivalent to Paper Weight 4 or higher. Do not try this as a solution when using paper with a thickness equivalent to Paper Weight 3 or lower, as it may cause paper misfeeding.
Adjusting the Current Applied to the Leading Edge of the Paper
 In [Detailed settings] for the custom paper you are using, select 1216: [Paper Transfer Output Correction: Paper Edge].
1216-01: Paper Transfer Output Correction: Paper Edge: BW: Leading Edge
1216-06: Paper Transfer Output Correction: Paper Edge: FC/FCS: Leading Edge
1216-11: Paper Transfer Output Correction: Paper Edge: S: Leading Edge: Clear/Special
1216-12: Paper Transfer Output Correction: Paper Edge: S: Leading Edge: White
1216-13: Paper Transfer Output Correction: Paper Edge: S: Leading Edge: Metallic
 Adjusting the paper transfer current.
If the paper transfer current is insufficient, increase the value by one step.
If the paper transfer current is excessive, decrease the value by one step.
 Print the image. Has the problem been resolved?
Yes | Finished! |
No | Start over from Step 2. |
In case of excessive paper transfer current, if the problem persists even after decreasing the value to the lower limit, there is no other solution.
In case of insufficient paper transfer current, if the problem persists even after increasing the value to the upper limit, go to the next step.
 Select 1216: [Paper Transfer Output Correction: Paper Edge], and then increase the value in the following corresponding settings by "5 mm".
1216-02: Paper Transfer Output Correction: Paper Edge: BW: Leading Edge Length
1216-07: Paper Transfer Output Correction: Paper Edge: FC/FCS: Leading Edge Length
1216-15: Paper Transfer Output Correction: Paper Edge: S: Leading Edge Length: Clear/Special
1216-16: Paper Transfer Output Correction: Paper Edge: S: Leading Edge Length: White
1216-17: Paper Transfer Output Correction: Paper Edge: S: Leading Edge Length: Metallic
 Print the image. Has the problem been resolved?
Yes | Finished! |
No | Start over from Step 4. If the problem persists even after increasing the value to the upper limit, there is no other solution. |

Increasing or decreasing the current applied to the leading edge of the paper may increase the occurrence of white spots at the leading edge. Adjust the settings while checking the result. If the white spot problem worsens, restore the previous settings.
Select "Clear/Special" when using Neon Yellow, Neon Pink, or Invisible Red. Select "Metallic" when using Gold or Silver.
After performing the solution, it is recommended to perform the color calibration of the external printer controller.