Changing Tray Paper Settings
In the [Media] hub, or on the [Tray Status] tile in the [Home] hub, assign a Custom Paper to a tray. You can also assign a paper type or paper weight individually to a tray on the [Tray Status] tile in the [Home] hub.
When you are finished specifying the paper settings, load the paper of the specified size and type onto the tray.

If the specified size differs from the actual size of the paper loaded in the paper tray, a misfeed might occur because the correct paper size is not detected.
If the specified paper type differs from the actual type of paper that is loaded in the paper tray, the paper might misfeed, the toner might not fuse properly, or the print quality might be reduced.
Paper that can be specified on a tray varies depending on the tray. You cannot specify paper that is not supported on the tray.
Specifying a Custom Paper on the Tray in the [Media] Hub
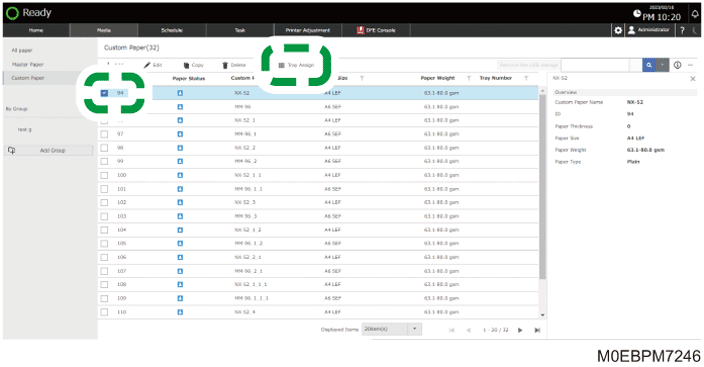
 Press the [Media] hub.
You can also press [Custom Paper] or Group, and select the paper to edit from either list.
 Select the check box of the paper to specify on the tray, and press [Tray Assign].
 If required, press [Select Paper Size], and specify a paper size.
You can change the paper size when specifying a Custom Paper in which more than one paper sizes are registered.
 Select the check box of the tray on which to specify the paper, and press [OK].
 Press [OK].
The paper tray is now specified with the selected Custom Paper.
Specifying a Custom Paper on the Tray in the [Home] Hub
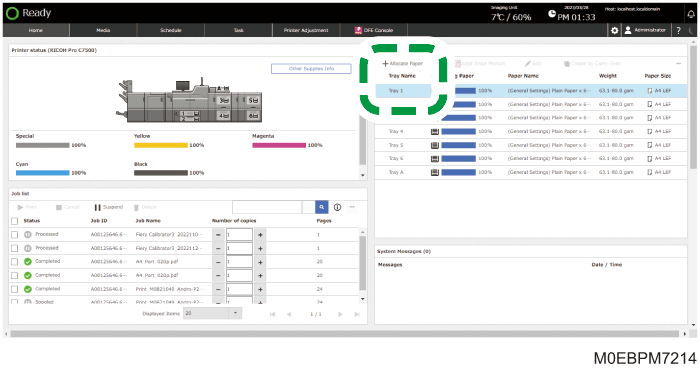
Press the [Home] hub.
On the [Tray Status] tile, specify the tray to change the paper setting, and then press [Allocate Paper].
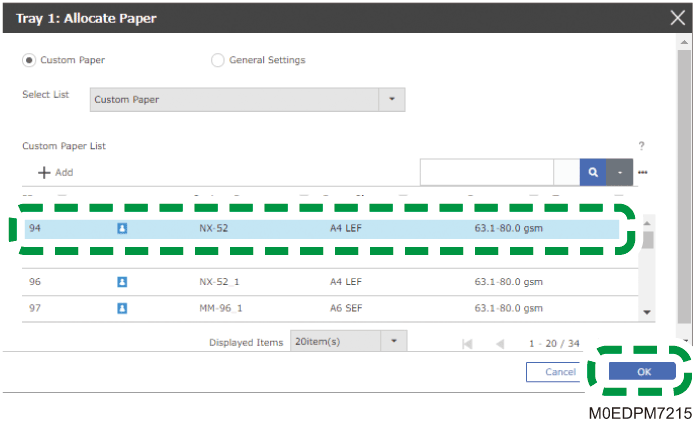
Specify [Custom Paper].
The Custom Paper that is registered in the [Media] hub is displayed.
When using a Custom Paper that belongs to a grope on the [Media] hub, specify the group in "Select List".
Specify a Custom Paper to configure, and then press [OK].
 Select the check box of the paper size to register, and then press [OK].
The Custom Paper of the selected paper size is assigned to the tray.
Specifying the General Settings on a Tray in the [Home] Hub
Press the [Home] hub.
On the [Tray Status] tile, specify the tray to change the paper setting, and then press [Allocate Paper].
Specify [General Settings].
Specify "Paper Type" and "Weight of Paper".
When changing the paper size, press [Change Paper Size], and specify the paper size.
Press [OK].
The settings are applied to the tray.