Scanning a Photo, Name Card, Receipt, and Other Small Sized Original
Place a small sized original on the exposure glass and then specify the size to scan. When the one-pass duplex scanning ADF is attached to the machine, you can also place a small sized original in the ADF.
-
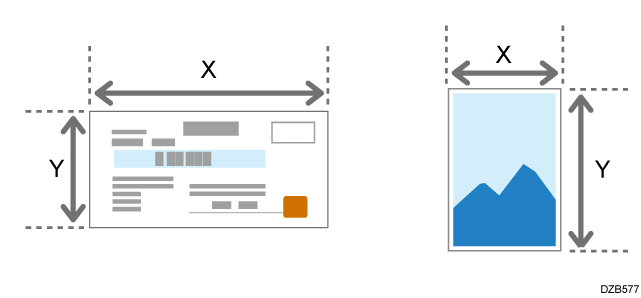
Using a ruler, measure the vertical and horizontal sizes of the original.
-
Press [Scanner] on the Home screen.
-
Press [Send Settings] on the scanner screen.

-
Press [Scan Size]
 [Custom Size].
-
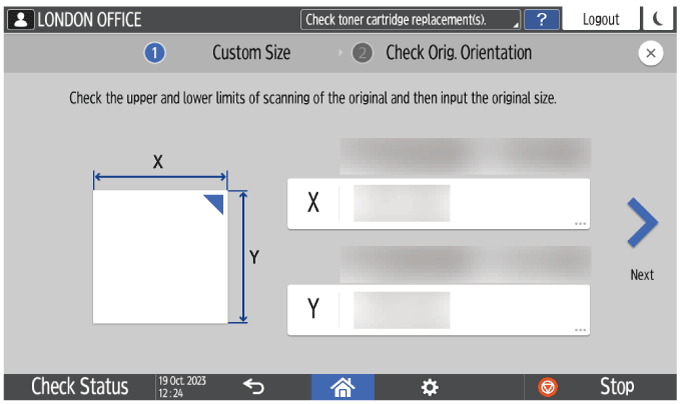
Enter the values of X and Y that you measured in Step 1 and proceed to the next screen.
-
While maintaining the same X-Y orientation as shown, place the original on the machine and press [OK].
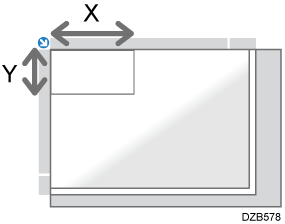
Placing an Original on the Exposure Glass -
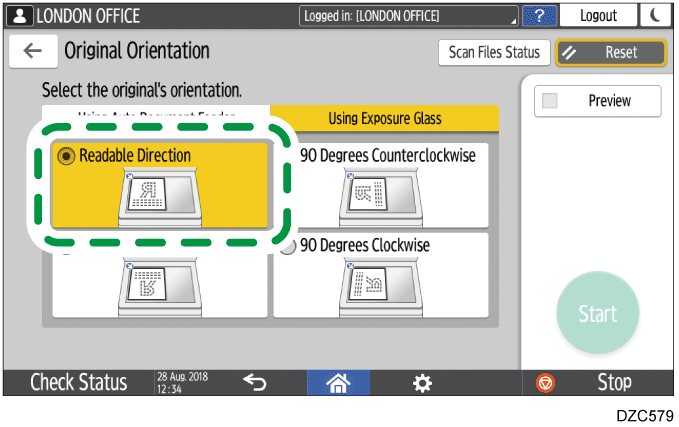
Press [Original Orientation] and select [Readable Direction].
-
Specify the scan settings according to the purpose of the scanned data.
Scanning an Original with Suitable Quality and Density
Specifying the File Type or File Name When Scanning a Document -
To send the scanned document to an e-mail address, press [Sender] and then specify the sender.
When a logged in user is operating the machine, the logged in user becomes the sender.
Scanning Documents and Sending the Scanned Data by E-mail -
Specify the destination on the scanner screen, and press [Start].
-
Press [Finish Scn] after scanning all the originals.
Small sized originals such as receipts and postcards can be scanned all together.
-
Using a ruler, measure the vertical and horizontal sizes of the original.
-
Press [Scanner] on the Home screen.
-
Press [Send Settings] on the scanner screen.
-
Press [Scan Size]
[Custom Size]. -
Place the original to scan in the one-pass duplex scanning ADF.
Placing Originals in the One-pass Duplex Scanning ADF -
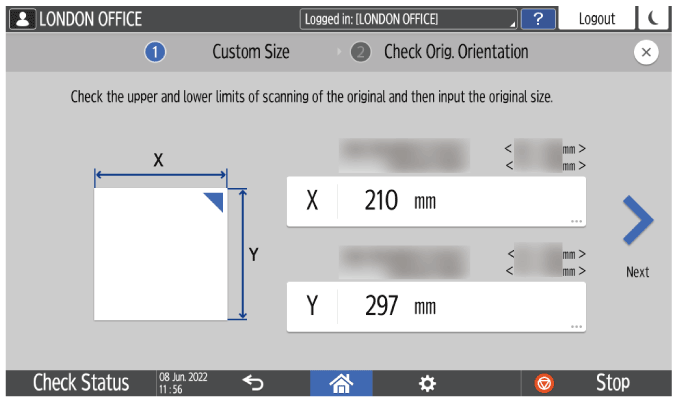
On the screen for specifying the vertical and horizontal sizes of a custom size original, enter the values of X and Y that you measured.
-
Specify the scan settings according to the purpose of the scanned data.
Scanning an Original with Suitable Quality and Density
Specifying the File Type or File Name When Scanning a Document -
To send the scanned document to an e-mail address, press [Sender] and then specify the sender.
When a logged in user is operating the machine, the logged in user becomes the sender.
Scanning Documents and Sending the Scanned Data by E-mail -
Specify the destination on the scanner screen, and press [Start].