Scanning Documents and Sending the Scanned Data by E-mail
Scan a document and attach the scanned data to an e-mail and send it from the machine.
Configure the SMTP server and network settings in advance.
Register an e-mail address in the address book to select the address as the destination easily when sending an e-mail.
Basic Procedure for Sending an E-mail

This machine supports SMTPS (SMTP over SSL).
This machine supports Web mail sending.
To use Message Disposition Notification, log in to the machine as a user and specify the sender. Note, however, that the [Reception Notice] notification e-mail may not be transmitted if the e-mail software of the recipient does not support Message Disposition Notification.
If you press [Preview] and then start scanning, the Preview screen appears. You can use this screen to check how the originals are scanned and the scan setting used for scanning. After checking the preview, you can specify whether to send the file or not.
Displaying a Preview Before Sending the Scanned DocumentAfter an e-mail is sent, the destination, sender, subject, text, and file name fields will be automatically cleared. If you want to preserve the information in these fields, contact your local dealer.
 Press [Scanner] on the Home screen.
 Select [Scan to Email] on the scanner screen.
 Place the original on the scanner.
 Press [Send Settings] on the scanner screen.
 Press [Sender] and specify the sender.
When a logged in user is operating the machine, the logged in user becomes the sender.
When [On] is specified in [System Settings]
 [Send (Email/Folder)][Email][Auto Specify Sender Name], you can send an e-mail even when the sender is not specified. The administrator's e-mail address that is registered on the machine is used as the sender.
Specify the sender to receive an opening confirmation.
 Select the [Reception Notice] check box to receive an opening confirmation of the e-mail from the destination.

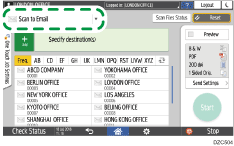
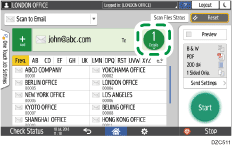
 Specify the destination on the scanner screen.

To enter the e-mail address manually, select the destination from the destination history, or search for the destination in the address book, press
 , and specify the destination.
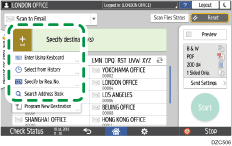
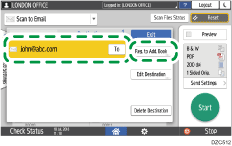
Press
 to specify the destination again or select [To], [Cc] or [Bcc].
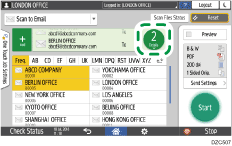
You can specify multiple destinations.
If the target destination does not appear, display the destination by selecting its initial letter from the title.
Depending on the security setting, some destinations may not appear in the destination list.
 Specify the scan settings according to the purpose of the scanned data.
Scanning an Original with Suitable Quality and Density
Specifying the File Type or File Name When Scanning a Document
 Press [Start].
Registering the E-mail Destination Specified When Sending an E-mail in the Address Book
When specifying an e-mail address by entering it manually or selecting it from the scanner records, you can register the e-mail address in the address book before sending an e-mail.
Press [Scanner] on the Home screen.
Select [Scan to Email] on the scanner screen.
Place the original on the scanner.
Press [Send Settings] on the scanner screen and configure the scan settings according to the purpose of the scanned data.
Scanning an Original with Suitable Quality and Density
Specifying the File Type or File Name When Scanning a Document
Specify the destination.
When entering manually
Press
and then select [Enter Using Keyboard].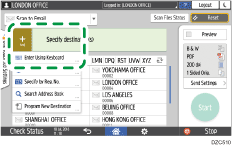
Enter the e-mail address, and press
 .
.
Specify the e-mail address that was entered manually and press [Reg. to Add. Book].
Enter the name and other additional information.
When selecting from the transmission history
Press
and then select [Select from History].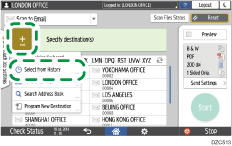
Press [Register] of the destination to register.
Register the name and other additional information.
Press [OK] to close the address book screen after registering the information.
Press [Start] on the scanner screen.