Using Web Image Monitor
Web Image Monitor is a screen to confirm the machine status and settings on the computer.
When the machine and a computer can be connected to a network, you can access to Web Image Monitor by entering the IP address of the machine on the address bar of the Web browser.
Accessing to Web Image Monitor
 Enter the IP address of the machine in the address bar of the Web browser.

Example: when the IP address of the machine is "192.168.1.10"
If SSL is specified
https://192.168.1.10/
If SSL is not specified
http://192.168.1.10/
When you do not know whether SSL is specified on the machine, enter the address starting with https. When you fail the connection, enter the address starting with http.
When entering the IPv4 address, do not enter "0" for each segment. If "192.168.001.010" is entered, you cannot access the machine.
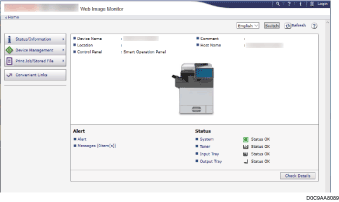
 Confirming the machine status or settings on the top page of Web Image Monitor.

The machine status and remaining amount of consumables are displayed.
You can access Web Image Monitor more quickly by registering the machine's URL as a bookmark. Note that the URL you register must be the URL of the top page, which is the page that appears before login. If you register the URL of a page that appears after login, Web Image Monitor will not open properly from the bookmark.
To change the settings, click [Login] at the top right on the screen and enter the User Name and Password.
Recommended Web Browser
Windows | macOS |
|---|---|
Internet Explorer 11 or later | Safari 3.0 or later |
Firefox 52 or later | Firefox 52 or later |
Google Chrome version 50 or later | Google Chrome version 50 or later |
Microsoft Edge 20 or later | - |
You can use the screen reader software JAWS 7.0 or later on Internet Explorer.

When you use a DNS server or WINS server, you can use Host Name instead of IP address to connect the server.
When the screen is distorted or the operation is unstable, confirm that "JavaScript" or "Use Cookies" is specified to Active on the computer.
When using Host Name under Windows Server 2008 or later in the IPv6 environment, resolve Host Name in the external DNS server. You cannot use the host file.
When specifying the settings from Web Image Monitor, do not log in to the machine from the control panel. The setting value may not be reflected.
If you are using a proxy server, change the web browser settings so that no data goes through the proxy server to connect to this machine. Contact your administrator for information about the settings.
If you click your browser's back button but the previous page does not appear, click the browser's refresh button and try again.
What You Can Do on the Web Image Monitor
Items displayed on the Web Image Monitor and settings depend whether the machine is logged in.
When not logged in
The machine status, settings, and job status are displayed. You can browse the settings of the machine but cannot change them.
When logged in (as a user)
Log in as a user registered in the Address Book. The users can operate the jobs that they executed and change a part of settings of the machine.
When logged in (as an Administrator)
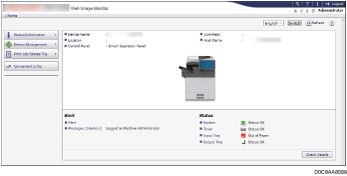
The administrator can change all settings of the machine.
Function | Not logged in | User | Administrator |
|---|---|---|---|
Machine status |
|
|
|
Machine settings |
|
|
|
Machine setting change | - |
|
|
Job list |
|
|
|
Job history |
|
|
|
Access to Address Book | - |
|
|
File operation in Document Server | - |
|
|
Network settings | - |
|
|
Network settings change | - |
|
|
Cancel printing | - | - |
|
Security settings | - | - |
|
![]() : Available -: Not available
: Available -: Not available
*1 Depending on the Administrator settings
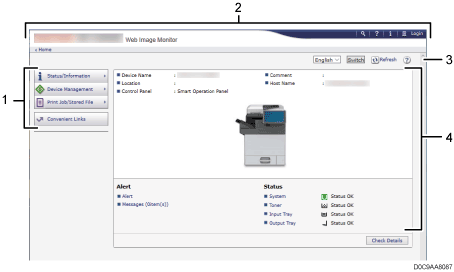
Web Image Monitor Screen

Menu
Menu items described below are displayed.
Status/Information: Displays the machine status, option configuration, counter, and job status.
Device Management: Manages the machine settings and Address Book.
Print Job/Stored File: Operates the files stored in the printer driver or document server.
Convenient Links: Displays the link to the Favorite URL.
Header
An icon to link to the Login screen is placed at the top right on the screen. The Help, Version Information, and Keyword Search buttons are also displayed.
Refresh/Help
 (Refresh): Update the information in the work area.
 (Help): View or download Help file contents.
Main Area
The machine status and settings are displayed.
Specifying Web Image Monitor Help
Web Image Monitor has Help to describe the function of setting items. When you use Help for the first time, you can select to read online Help or to download Help File.
View Online Help Now
You can view the latest Web Image Monitor Help on the Internet.
Download Help File
You can download Web Image Monitor Help to the computer and view it. When you store the downloaded Help file in the Web server and assign to the Help button (![]()
![]() ), you can view the Help without connecting to the Internet.
), you can view the Help without connecting to the Internet.
To assign the downloaded Help file to the Help button (![]()
![]() ), specify the path to the Help file following the procedure below.
), specify the path to the Help file following the procedure below.
 Log in to Web Image Monitor as an Administrator.
 Click the Help button (
![]()
![]() ) at the top right on the screen.
) at the top right on the screen.

 Select the operating system and displayed language, and then click [Download].
 Unzip the downloaded zip file and store it in the Web server.
 Click [Configuration] on the "Device Management" menu on Web Image Monitor.
 Click [Webpage] under the "Webpage" category.
 Enter the path to the Help file stored in the Web server in "URL" under "Set Help URL Target".
For example, when URL of the Help File is "http://a.b.c.d/HELP/JA/index.html", enter "http://a.b.c.d/HELP/".
 Click [OK].
 After completing the procedure, log out and finish Web Image Monitor.
