Registering Groups in the Address Book
Register fax destinations and e-mail addresses as a group to send faxes or e-mails to the members registered in the group at one time.

Up to 500 destinations can be registered in a group.
You cannot send data by Send to Folder to a group that includes 50 or more folder destinations.
Creating a Group
 Press [Address Book] on the Home screen.
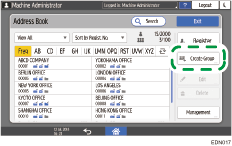
 Press [Create Group] on the Address Book screen.
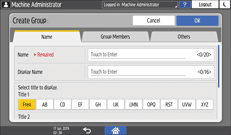
 Enter the information of the group on the [Name] tab, and then select a title to classify it.
 Press [Group Members] tab
  [Add Member].
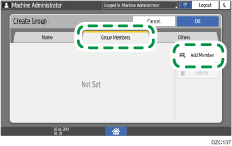
 Select the members to register in a group, and then press [OK].
 Press the [Others] tab, and specify the required settings.
Registration Destination Group: Press to register this group to another group.
Display Priority: When the destinations are sorted in the order of priority, a destination with higher priority is displayed prior to the one with lower priority. The destinations with the same priority are displayed in the order of registration.
Destination Protection: Select this check box to require entering of the protection code to select the group. If a group includes a member to whom the folder destination is specified, the protection can be set on the group.
Using the Protection Function to Prevent the Misuse of Addresses
Access Privileges for Destination: Press to set permission for users or groups to access this group destination.
Using the Protection Function to Prevent the Misuse of Addresses
 Press [OK].
 After completing the procedure, press [Home] (
 ).
).

When you register a new destination, you can specify the group.
Registering the Destination Folder to Use for Send to Folder
Registering a Group to Another Group
You can register another group to the group in addition to destinations. For example, you can register a company as a primary group, and multiple sections as the secondary group.
 Press [Address Book] on the Home screen.
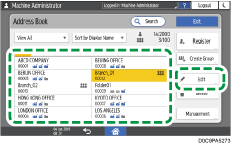
 Select a group to register (secondary group) on the Address Book screen, and then press [Edit].
 Press the [Others] tab
  [Registration Destination Group].
 Press [Select Group].
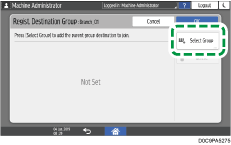
 Select a group (primary group), and then press [OK].
 Press [OK]
 [OK].
[OK].
 After completing the registration, press [Home] (
 ).
).
Changing/Deleting the Data Registered to the Group
 Press [Address Book] on the Home screen.
 Select the group to change or delete on the Address Book screen.
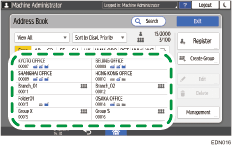
 Press [Edit] or [Delete] to change or delete the group information.
 When changing or deleting is complete, press [Home] (
 ).
).
Confirming Users Registered to the Group
 Press [Address Book] on the Home screen.
 Select the group whose registered users you want to confirm, and then press [Edit].
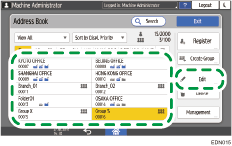
 Press the [Group Members] tab.
The registered members are displayed.
 When confirming is complete, press [Cancel]
 [Home] (
 ).
).
