Cleaning the Machine
This section explains how to clean the machine.
Smears or dust may appear on copied documents or scanned images when the exposure glass, scan glass, ADF, or dustproof glass becomes dirty. Clean those parts.

- Contact your sales or service representative for cleaning the machine's interior. If the machine's interior is not regularly cleaned while dust accumulates, fire and malfunction can result.

Do not use chemicals such as cleaning liquid and organic solvents such as paint thinner and benzene for cleaning. It may seep inside the machine through the gaps or melt the plastic material composing the exterior cover, causing malfunctions to occur.
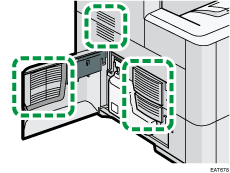
Your service representative will replace the ozone and dust filters as needed.
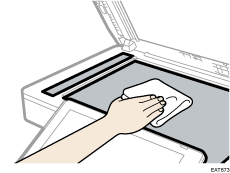
Cleaning the Exposure Glass and Scan Glass
Use the cleaning cloth provided with the machine to wipe the parts.
 Wipe the exposure glass and scan glass.
Cleaning the Auto Document Feeder (ADF)
Use a dry soft cloth to wipe the part.
 Wipe the seat and guide plate in the ADF.
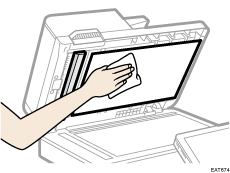

If dirt does not come off when wiped with a dry cloth, use a cloth that has been soaked in water and thoroughly wrung out.
If dirt does not come off even when wiped with a wet cloth, use neutral detergent and use a dry cloth to wipe off any moisture.
Cleaning the Paper Tray, Separator Roller, and the Paper Feed Roller
If the paper tray, separator roller, or paper feed roller is dirty, a multi-feed or misfeed might occur. Clean these parts by following the cleaning procedure for Tray 1 described below. The cleaning procedure is the same for the optional paper feed units.
 Pull the tray carefully until it stops, lift the front side of the tray, and then pull it out of the machine.
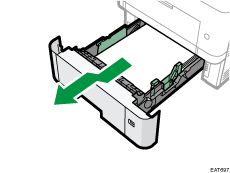
Place the tray on a flat surface.
 If there is paper in the tray, remove the paper.
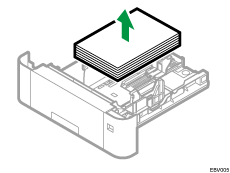
 Wipe the areas indicated in the illustrations below using a dry or damp cloth.
Separator roller

Wipe the whole separator roller by rolling it and using a moistened and firmly wrung out cloth.
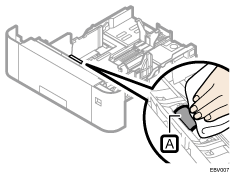
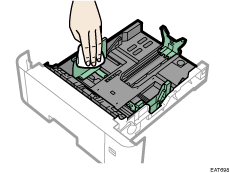
Paper tray
Use a moistened and firmly wrung out cloth.
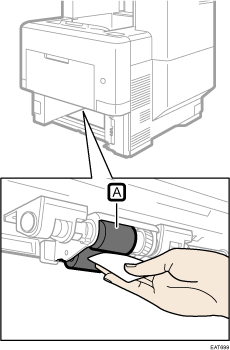
Paper feed roller

Wipe around the paper feed roller by turning it with a damp cloth. Then, wipe it with a dry cloth to remove any water.
 Load the removed paper stack in the tray.
 Lift the front side of the tray, and then slide it into the machine carefully until it stops.
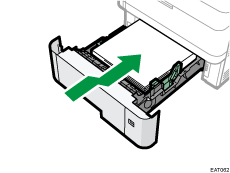
Do not slide the paper tray in forcefully. Otherwise, the end and side fences might move.
Cleaning the Registration Roller
When you use paper other than the standard types, specks of paper may stick on the registration roller, causing problems. Clean the registration roller if white dots appear on prints.
Clean the registration roller if printed paper becomes smeared after a paper jam is cleared.

- Clean areas around the resist roller after confirming that the machine is turned off and the main unit is not hotter than the room temperature. Otherwise, you will be burned.
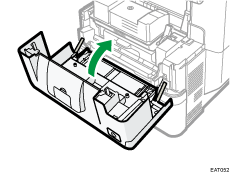
 Open the front cover with both hands carefully.
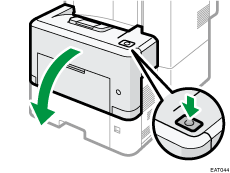
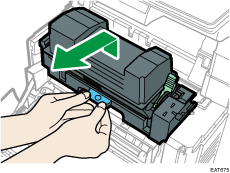
 Squeeze the clip on the print cartridge and pull it out.
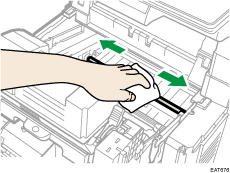
 Wipe the registration roller with a dry cloth to remove the moisture.
 Squeeze the clip on the print cartridge, and then insert it into the machine until it stops.
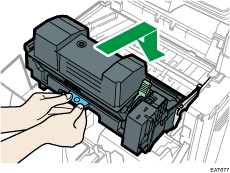
 Close the front cover with both hands carefully.
If the front cover does not close, do not force it. Check if the print cartridge is properly installed.
Cleaning the Vents
 Open the left cover.
 Wipe the vents with a dry cloth to remove the moisture.
