Adjusting the Image Density
Maximized settings may produce smudged printouts.
Image Density settings should be made from the application or the printer driver whenever possible.
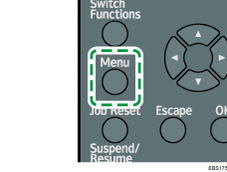
![]() Press the [Menu] key.
Press the [Menu] key.
![]() Select [Maintenance], and then press the [OK] key.
Select [Maintenance], and then press the [OK] key.
![]() Select [Quality Maintenance], and then press the [OK] key.
Select [Quality Maintenance], and then press the [OK] key.
![]() Select [Image Density Adjustment], and then press the [OK] key.
Select [Image Density Adjustment], and then press the [OK] key.
![]() Press the [
Press the [ ] or [
 ] key to specify the image density, and then press the [OK] key.
You can specify the image density in the range from -2 to +2. Increasing the value makes the printouts darker and decreasing the value makes the printouts lighter.
![]() Press the [Menu] key.
Press the [Menu] key.
![]()
If the item you want to select is not displayed on the screen, press the [
] or [] key on the control panel to change the screen.