Making a Backup or Restoring the Address Book
You can save the backup data of the address book in a computer and restore it when required.
Use Web Image Monitor to create a backup of or restore the address book.
![]()
If administrator authentication is specified, use the user administrator account to create a backup of or restore the address book.
To prevent eavesdropping of the data, encrypt the address book data before making a backup.
The data registered or changed after the backup was created will be lost when you restore the address book.
When restoring the address book, the following information registered using the address book is initialized:
Function | Item |
|---|---|
Scanner | Programs using the destinations |
Fax | Sender of sending documents Reception File Settings Reception File Settings Notify destination of Folder Transfer Result Report Stored Reception File User Setting Receiver of Back Up Transmission Settings |
![]() Start the Web browser.
Start the Web browser.
![]() Enter "http://(IP address of the machine) or (host name)/" in the address bar of the Web browser.
Enter "http://(IP address of the machine) or (host name)/" in the address bar of the Web browser.
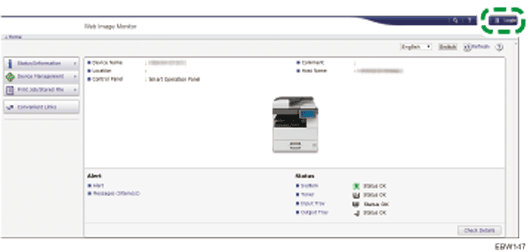
![]() On the top page of Web Image Monitor, click [Login].
On the top page of Web Image Monitor, click [Login].

![]() Enter the login user name and password of the administrator, and then click [Login].
Enter the login user name and password of the administrator, and then click [Login].
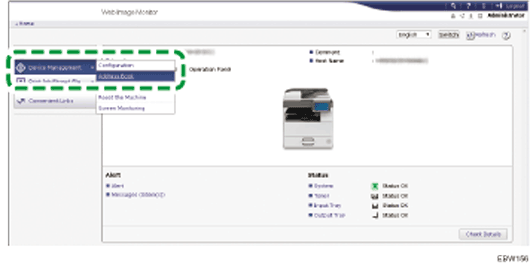
![]() Click [Address Book] from the [Device Management] menu.
Click [Address Book] from the [Device Management] menu.

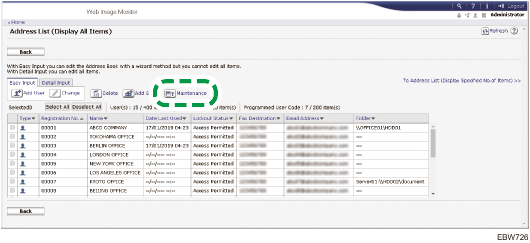
![]() On the "Address List" screen, click [Maintenance].
On the "Address List" screen, click [Maintenance].

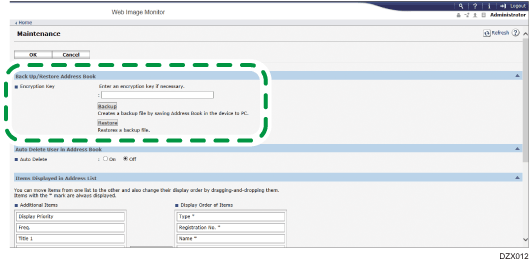
![]() Backup or restore the address book.
Backup or restore the address book.

To backup
Click [Backup] and specify the location to store the address book data, and the "Device name.udf" file is stored.
To encrypt the address book data, enter an encryption key using up to 32 single-byte alphanumeric characters, and then click [Backup]. Be careful not to forget the encryption key entered here. You are required to enter it again when restoring the data.
To restore
Click [Restore] and select the backup data of the address book to start the restoration process.
To restore the encrypted data of the address book, enter the encryption key specified when creating the backup, and then click [Restore].
![]() After backup or restoring, click [Logout], and then close Web Image Monitor.
After backup or restoring, click [Logout], and then close Web Image Monitor.

 Forwarding Destination