 Send Scanned Files to a Shared Folder
Send scanned files to the shared folder registered in Step 5.
![]()
The original in the ADF takes precedence over the original on the exposure glass if you place originals both in the ADF and on the exposure glass.
Register the scan destination in the Address Book using Web Image Monitor. For details, see Registering Scan Destinations.
When a USB flash memory device is inserted into the machine, scanned documents will be stored in the USB flash memory device. Confirm that there are no USB flash memory devices inserted into the machine.
![]() Place the original on the exposure glass or in the ADF.
Place the original on the exposure glass or in the ADF.
To place the original, see Placing Originals.
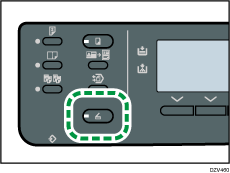
![]() Press the [Scanner] key.
Press the [Scanner] key.

![]() Press the selection key under [Addr].
Press the selection key under [Addr].

![]() Press the [
Press the [![]() ] or [
] or [![]() ] key to select [Search By Name] or [Search By ID], and then press the [OK] key.
] key to select [Search By Name] or [Search By ID], and then press the [OK] key.

![]() If you want to search for a specific entry by its name, enter the first letters of the name using the number keys, and then press the [OK] key. Each time you enter a character, the display changes to show the matching name.
If you want to search for a specific entry by its name, enter the first letters of the name using the number keys, and then press the [OK] key. Each time you enter a character, the display changes to show the matching name.
![]() Search for the desired destination by pressing the [
Search for the desired destination by pressing the [![]() ] or [
] or [![]() ] key to scroll the Address Book, and then press the [OK] key.
] key to scroll the Address Book, and then press the [OK] key.
When you specify a scan destination, the machine's scan settings change automatically according to the information registered for that destination in the Address Book. If necessary, you can change the scan settings using the control panel. For scan settings, see Scan Settings.
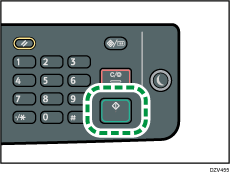
![]() Press the [Start] key.
Press the [Start] key.

Depending on the machine's settings, you may see the following screen on the display when scanning from the exposure glass.

If you see this screen, proceed to the next step.
![]() If you have more originals to scan, place the next original on the exposure glass, and then press the selection key under [Yes]. Repeat this step until all originals are scanned.
If you have more originals to scan, place the next original on the exposure glass, and then press the selection key under [Yes]. Repeat this step until all originals are scanned.
![]() When all originals have been scanned, press the selection key under [No] to start sending the scanned file.
When all originals have been scanned, press the selection key under [No] to start sending the scanned file.
![]()
To cancel scanning, press the [Clear/Stop] key. The scan files are discarded.
