Adjusting the Print Position
You can adjust the printing position. Normally you do not need to update the printing position. However, updating is useful in some cases.
You can adjust the printing position for the following items:
Horizontal and vertical positions for Trays 1 to 4 and bypass tray
Horizontal and vertical positions for the back side of the paper during duplex printing
![]() Press [Home] (
Press [Home] ( ) at the bottom of the screen in the center.
![]() Flick the screen to the left, and then press the [User Tools] icon (
Flick the screen to the left, and then press the [User Tools] icon (![]() ).
).
![]() Press [Machine Features].
Press [Machine Features].
![]() Press [Maintenance].
Press [Maintenance].
![]() Press [Adjust Print Position].
Press [Adjust Print Position].
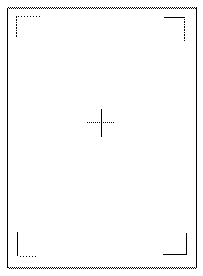
![]() Press [Print Test Sheet] next to the tray which you want to adjust.
Press [Print Test Sheet] next to the tray which you want to adjust.
For the bypass tray, you cannot print the test sheet. Proceed to Step 8.
![]() Press [Start Printing] to print the test sheet to preview the settings.
Press [Start Printing] to print the test sheet to preview the settings.

Use this sheet to confirm the current print position.
![]() Select the tray you want to adjust.
Select the tray you want to adjust.
![]() Change the registered value (mm) using the number keys.
Change the registered value (mm) using the number keys.
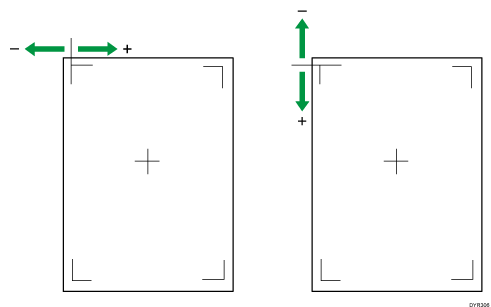
Increase the value to shift the print area in the direction indicated by the "+" symbol in the diagram below. Decrease to shift the print area in the direction indicated by the "-" symbol.

![]() Press [OK].
Press [OK].
![]() If you want to adjust the back side, press [Print Test Sheet] next to [Back Side].
If you want to adjust the back side, press [Print Test Sheet] next to [Back Side].
![]() Print the test sheet to preview the settings.
Print the test sheet to preview the settings.
Use this sheet to confirm the current print position.
![]() Press [Back Side].
Press [Back Side].
![]() Use the same procedure as Step 9 to change the registered value (mm) using the number keys.
Use the same procedure as Step 9 to change the registered value (mm) using the number keys.
![]() Press [OK].
Press [OK].
![]() Press [Exit] twice.
Press [Exit] twice.
![]() Press [User Tools] (
Press [User Tools] ( ) on the top right of the screen.
![]() Press [Home] (
Press [Home] ( ) at the bottom of the screen in the center.
