Interface Settings
This section describes the user tools in the Interface Settings menu under [System Settings].
For details on how to access Screen Features, see Accessing System Settings.
Network
This section describes the user tools in the Network menu under [Interface Settings].
We recommend only enabling one of the following settings: IPv6 gateway address manual settings, IPv6 stateless address automatic settings, or DHCPv6 settings. If you do not want the IPv6 gateway address to be changed automatically, do not enable IPv6 gateway address manual settings, IPv6 stateless automatic settings, and DHCPv6 settings at the same time.
An IPv6 gateway address automatically acquired may be set by the router or in accordance with the DHCPv6 server settings if the following settings are enabled at the same time;
IPv6 gateway address manual settings and either IPv6 stateless address automatic settings or DHCPv6 settings
IPv6 stateless address automatic settings and DHCPv6 settings
Machine IPv4 Address
Specify the machine's IPv4 network address.
Default: [Auto-Obtain (DHCP)]
When you select [Specify], enter the IPv4 address and subnet mask as "xxx.xxx.xxx.xxx" ("x" indicates a number).
When you select [Specify], make sure that the IPv4 address is different from that of other machines on the network.
The physical address (MAC address) also appears.
IPv4 Gateway Address
A gateway is a connection or interchange point between two networks.
Specify the gateway address for the router or host computer used as a gateway.
Default: [0.0.0.0]
Machine IPv6 Address
Display the machine's IPv6 network address.
Link-local Address
The machine's specified link-local address appears.
Manual Configuration Address
The machine's manually configured address appears.
DHCPv6 Address
The machine's DHCPv6 address appears.
Stateless Address: 1–5 addresses
The specified stateless address appears if [IPv6 Stateless Address Autoconfiguration] is set to [Active].
IPv6 Gateway Address
Display the machine's IPv6 gateway address.
IPv6 Stateless Address Autoconfiguration
Specify IPv6 Stateless Address Autoconfiguration.
Default: [Active]
DHCPv6 Configuration
Specify the DHCPv6 setting.
Default: [Inactive]
If you set to [Active], select "Operation Mode" from [Router Request], [Obtain IP Address] or [Do not obtain IP Address], and also select "DNS Server Address" from [Auto-Obtain (DHCPv6)] or [Specify].
DNS Configuration
Make settings for the DNS server.
Default: [Auto-Obtain (DHCP)]
When you select [Specify], enter the DNS Server IPv4 address as "xxx.xxx.xxx.xxx" ("x" indicates a number).
DDNS Configuration
Specify the DDNS settings.
Default: [Active]
IPsec
Specify the machine's IPsec setting.
Default: [Inactive]
For details about this function, see "Configuring IPsec Settings", Security.
Domain Name
Specify the domain name.
Default: [Auto-Obtain (DHCP)]
When you select [Specify], enter the domain name up to 63 characters.
WINS Configuration
Specify the WINS server settings.
Default: [On]
If [On] is selected, enter the WINS Server IPv4 address as "xxx.xxx.xxx.xxx" ("x" indicates a number).
If DHCP is in use, specify a Scope ID. Enter the Scope ID up to 31 characters.
Do not enter "255.255.255.255" as the primary or secondary WINS server address.
Effective Protocol
Select protocols to use in the network.
Default for "IPv4": [Active]
Default for "IPv6": [Inactive]
Default for "SMB": [Active]
Default for "@Remote Service": [Active]
Default for "Firmware Update (IPv4)": [Active]
Default for "Firmware Update (IPv6)": [Active]
SMB Computer Name
Specify the SMB computer name.
Enter the computer name up to 15 characters.
"*+,/:;<>=?[\]|. and spaces cannot be entered.
Do not set a computer name starting with RNP and rnp.
Only use uppercase letters for alphabets.
SMB Work Group
Specify the SMB work group.
Enter the group name up to 15 characters.
"*+,/:;<>=?[\]|. and spaces cannot be entered.
Only use uppercase letters for alphabets.
SMB Client Advanced Settings
Specify the SMB client settings.
Default for "Port Number": [445]
Default for "SMBv2/SMBv3": [Active]
If you select [Inactive], SMBv1 is used for SMB transmission.
Ethernet Speed
Set the access speed for networks.
Default: [Auto Select: Disable 1Gbps]
Select a speed that matches your network environment. [Auto Select: Disable 1Gbps] should usually be selected.
If you use an Ethernet interface cable that supports 1000BASE-T, set [Ethernet Speed] to [Auto Select: Enable 1Gbps] in [Interface Settings] in [System Settings].
Machine Setting | Settings of the connectable device |
|---|---|
Auto Select: Disable 1Gbps/ Auto Select: Enable 1Gbps *1 | Auto Select, 10 Mbps Half Duplex, 100 Mbps Half Duplex |
10 Mbps Full Duplex | 10 Mbps Full Duplex |
10 Mbps Half Duplex | Auto Select, 10 Mbps Half Duplex |
100 Mbps Full Duplex | 100 Mbps Full Duplex |
100 Mbps Half Duplex | Auto Select, 100 Mbps Half Duplex |
*1 Terms will vary depending on the network.
LAN Type
Select the method of connection.
[LAN Type] appears when the optional wireless LAN board is installed. If Ethernet and Wireless LAN are both connected, the selected interface has priority.
Default: [Ethernet]
Ping Command
Check the network connection with ping command using the given IP address.
If you fail to connect to the network, check the following, and then retry the ping command.
Make sure that "IPv4" in [Effective Protocol] is set to [Active].
Check that the machine with the assigned IPv4 address is connected to the network.
There is a possibility that the same IPv4 address is used for the specified equipment.
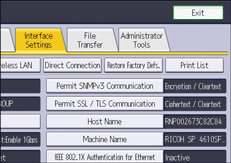
Permit SNMPv3 Communication
Set the encrypted communication of SNMPv3.
Default: [Encryption / Cleartext]
If you select [Encryption Only], you need to set an encryption password for the machine.
Permit SSL / TLS Communication
Set the encrypted communication of SSL/TLS.
Default: [Ciphertext / Cleartext]
If you select [Ciphertext Only], you need to install the SSL certificate for the machine.
The address, which you enter to access the machine using a web browser from networked computers, depends on which of the following encrypted communication modes you select for this setting. (We use Web Image Monitor installed on this machine.)
Encrypted communication mode | How to access the machine |
|---|---|
[Ciphertext Only] | Enter "https://(the machine's IP address or host name)/" to access the machine. |
[Ciphertext Priority] | If the device certificate is installed on your computer, enter "https://(the machine's IP address or host name)/" to access the machine. |
[Ciphertext / Cleartext] | If you enter "https://(the machine's IP address or host name)/", the machine communicates with encryption. If you enter "http://(the machine's IP address or host name)/", it communicates without encryption. |
Host Name
Specify the host name.
Enter the host name up to 63 characters.
The following host names are unacceptable:
a host name starting with or ending with a hyphen
a host name in which hyphens are used consecutively
a host name starting with "RNP" or "rnp"
Machine Name
Specify the machine name.
Enter the machine name up to 31 characters.
IEEE 802.1X Authentication for Ethernet
Specify the IEEE 802.1X authentication for Ethernet.
Default: [Inactive]
For details about IEEE 802.1X authentication, see "Configuring IEEE 802.1X Authentication", Security.
Restore IEEE 802.1X Authentication to Defaults
You can return the IEEE 802.1X authentication settings to their defaults.
For details about IEEE 802.1X authentication, see "Configuring IEEE 802.1X Authentication", Security.
USB Speed
You can select a USB speed setting.
Auto Select
Full Speed
Default: [Auto Select]
DIPRINT Timeout Period
Specify the DIPRINT timeout period when printing cannot be performed due to the job taking time to be sent.
Default: [15 second(s)]
You can set the time from 5 to 65535 seconds in increments of 1 second, using the number keys.
USB Port
Specify whether to enable or disable the USB connection.
 (mainly Europe)
Default: [Inactive]
(mainly Asia)
Default: [Active]
 (mainly North America)
Default: [Active]
Parallel Interface
This section describes the user tools in the Parallel Interface menu under [Interface Settings].
[Parallel Interface] is displayed when this machine is installed with the optional IEEE 1284 interface board.
Parallel Timing
Set the timing for the control signal of the parallel interface.
Normally, you do not need to change this setting.
Default: [ACK Outside]
Parallel Communication Speed
Set the communication speed for the parallel interface. If the speed is too high, data may not be transferred smoothly. If this happens, change the setting to [Standard].
Default: [High Speed]
Selection Signal Status
Set the level for the select signal of the parallel interface.
Default: [High]
Input Prime
Set whether to validate or invalidate the input prime signal upon reception.
Normally, you do not need to change this setting.
Default: [Inactive]
Bidirectional Communication
Set the machine's response mode to a status acquisition request when using a parallel interface. If you experience problems using another manufacturer's machine, set this to [Off].
Default: [On]
When set to [Off], the bidirectional communication function will be disabled, and the printer driver will not be installed under the Windows Auto Detect function.
Signal Control
Specify how to handle errors that occur during printing operation or facsimile transmission from a computer.
Default: [Job Acceptance Priority]
Wireless LAN
This section describes the user tools in the Wireless LAN menu under [Interface Settings].
[Wireless LAN] is displayed when this machine is installed with the optional wireless LAN board.
Be sure to make all settings simultaneously.
Communication Mode
Specify the communication mode of the wireless LAN.
Default: [Infrastructure Mode]
SSID Setting
Specify SSID to distinguish the access point in [Infrastructure Mode] or [802.11 Ad-hoc Mode].
Up to 32 alphanumeric and ASCII (0x20-0x7) characters can be specified.
The connection with a wireless LAN device can be made without entering the SSID of the access point when blank or "ANY" is entered in the SSID field.
Ad-hoc Channel
Specify the channel to use when [802.11 Ad-hoc Mode] has been selected. Set the channel that matches the type of the wireless LAN being used. Available channels may differ depending on the country.
The following channels are available:
IEEE 802.11 a/b/g Wireless LAN
Frequency range:
2412–2462 MHz (1–11 channels)
5180–5240 MHz (36, 40, 44 and 48 channels)
Default: [11]
Security Method
Specify the encryption of the Wireless LAN.
Default: [Off]
If you select [WEP], always enter a WEP key. If you select [WPA2], specify the encryption and authentication methods.
Specify "WPA2", when [Communication Mode] is set to [Infrastructure Mode].
WEP
If you select [WEP], enter a WEP key.
For a 64-bit WEP key, enter the key using either 10 hexadecimal characters or 5 ASCII characters.
For a 128-bit WEP key, enter the key using either 26 hexadecimal characters or 13 ASCII characters.
WPA2
WPA2 Authent. Method
Select either [WPA2-PSK] or [WPA2].
If you select [WPA2-PSK], enter the pre-shared key (PSK) of 8–63 characters in ASCII code.
When [WPA2] is selected, authentication settings and certificate installation settings are required. For details about setting methods, see "Configuring IEEE 802.1X Authentication", Security.
Wireless LAN: Easy Setup/Direct Connection
If you select [802.11 Ad-hoc Mode] or [Infrastructure Mode] in [Communication Mode], you can easily connect to a WPS-compliant access point through wireless LAN. This is called "Easy Setup".
If you select [Direct Connection: Group Owner Mode] or [Direct Connection Mode] in [Communication Mode], you can easily connect to a Wireless Direct-compliant device through wireless LAN. This is called "Direct Connection".
Select [Push Button] or [Enrollee] for Easy Setup or Direct Connection.
Default: [Push Button]
If you select [Push Button], press [Connect]. Press the push button of the access point in Easy Setup or the button of the device you want to connect to in Direct Connection.
If you select [Enrollee], enter the PIN code displayed on the machine into the access point in Easy Setup or the device you want to connect to in Direct Connection.
If you execute Easy Setup, the settings required for a wireless LAN connection are automatically specified. The settings below are configured automatically:
SSID
The value specified at the access point.
Authentication Method
WPA2-PSK: Off
Encryption Method
CCMP (If the authentication method is WPA2-PSK)
PSK
The value specified at the access point (If the authentication method is WPA2-PSK).
To perform Easy Setup or Direct Connection, select [Wireless LAN] in [LAN Type].
Direct Connection Settings
Specify the Wireless Direct function.
Device Name
Enter up to 23 characters for the device name.
Connection Password
Enter 8 to 63 characters for the connection password.
IPv4 Address
You can check the machine's IPv4 network address for Wireless Direct connection.
Connection Status
You can check the machine's direct connection status with other devices.
Wireless LAN Signal
When using infrastructure mode, press [Wireless LAN Signal] to display the machine's radio wave status.
Restore Factory Defaults
You can return the wireless LAN settings to their defaults.
Direct Connection
This section describes the user tools in the Direct Connection menu under [Interface Settings].
Active/Inactive
Specify whether or not to allow guests to use the machine in Direct Connection: Group Owner mode.
Default: [Inactive]
Direct Connection Settings
Specify the Direct Connection function.
Device Name
Enter up to 23 characters for the device name.
Connection Password
Enter 8 to 63 characters for the connection password.
IPv4 Address
You can check the machine's IPv4 network address for a Wireless Direct connection.
Connection Status
You can check the machine's Wireless Direct connection status with other devices.
Fix SSID
Specify whether or not to set the header text of SSID as "DIRECT-xy-". If this setting is disabled, two characters between "-" are randomly specified.
Default: Off
Restore Factory Defs.
You can restore some Interface Settings to their default values. Some settings do not return to their defaults.
Only administrators can restore factory defaults. To restore factory defaults, contact the administrator.
Print List
This section describes how to print a configuration page.
The configuration page shows the current network settings and network information.
![]() Press [Home] (
Press [Home] ( ) at the bottom of the screen in the center.
![]() Flick the screen to the left, and then press the [User Tools] (
Flick the screen to the left, and then press the [User Tools] (![]() ) icon.
) icon.
![]() Press [Machine Features].
Press [Machine Features].
![]() Press [System Settings].
Press [System Settings].
![]() Press [Interface Settings].
Press [Interface Settings].
![]() Press [Print List].
Press [Print List].
![]() Press [Start].
Press [Start].
The configuration page is printed.
![]() Press [Exit].
Press [Exit].
![]() Press [User Tools] (
Press [User Tools] ( ) on the top right of the screen.
![]() Press [Home] () at the bottom of the screen in the center.
Press [Home] () at the bottom of the screen in the center.
![]()
You can also exit by pressing [Exit] on the User Tools main menu.
You can also configure or change some Interface Settings from [Basic Settings When Installing] on the User Tools menu.
Related topics