Loading Paper into Paper Trays
Every paper tray is loaded in the same way.
In the following example procedure, paper is loaded into Tray 1.
![]()
If a paper tray is pushed vigorously when putting it back into place, the position of the tray's side fences and end fence may slip out of place.
When loading a low number of sheets, be sure not to squeeze the side fences and end fence in too tightly. If the side fences are squeezed too tightly against the paper, the edges may crease or the paper may misfeed.
Guide to names of paper tray
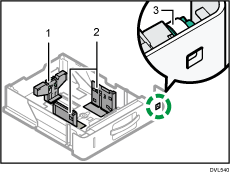
End fence
Side fence
Paper size dial
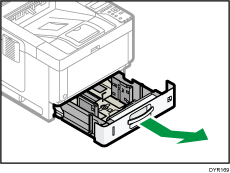
![]() Pull the paper tray carefully until it stops. Lift the front side of the tray, and then pull it out of the machine.
Pull the paper tray carefully until it stops. Lift the front side of the tray, and then pull it out of the machine.
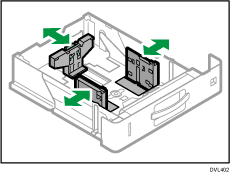
![]() Pinch the lever of the back fence and align it with the paper size. Next, pinch the lever of the right fence and align the right and left fences with the paper size.
Pinch the lever of the back fence and align it with the paper size. Next, pinch the lever of the right fence and align the right and left fences with the paper size.
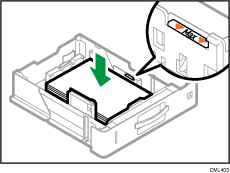
![]() Load the new paper stack print side down.
Load the new paper stack print side down.
Do not stack paper over the limit mark.
![]() Rotate the paper size dial, which is located at the front right of the tray, so that the size and the feed direction of the paper in the paper tray can be seen from the window.
Rotate the paper size dial, which is located at the front right of the tray, so that the size and the feed direction of the paper in the paper tray can be seen from the window.
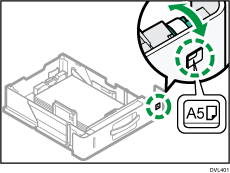
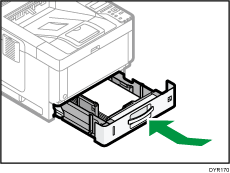
![]() Lifting the front side of the tray, insert it into the machine, and then push it in carefully until it stops.
Lifting the front side of the tray, insert it into the machine, and then push it in carefully until it stops.
![]()
While you are printing, a message informing you that the size of the paper that is loaded and the print setting are different may appear. To change the paper size, select [Job Reset] and load the correct size paper, and then try printing again. To not change the paper size, select [Loaded Paper].
A message informing you that the size of the loaded paper and the print settings are different may appear if multiple sheets are fed at one time. If this happens, take out the loaded paper, fan it, turn it over, load it again, and then select [Loaded Paper].
Various sizes of paper can be loaded in the paper by adjusting the positions of side fences and end fence. For details, see Changing Paper Size Settings.
Select appropriate paper thickness for the loaded paper.
When printing with [Thick Paper 3], remove printed sheets one by one.
Extending Tray 1
When loading paper larger than A4![]() , 81/2 × 11
, 81/2 × 11![]() into Tray 1, extend the tray.
into Tray 1, extend the tray.
Tray 2, tray 3 and tray 4 can also be extended by the procedure below.
![]() Pull the tray out of the machine.
Pull the tray out of the machine.

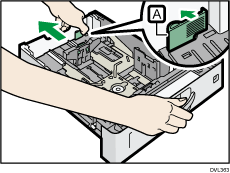
![]() Pinch the tray extension lever
Pinch the tray extension lever , and then slide the tray until it stops.
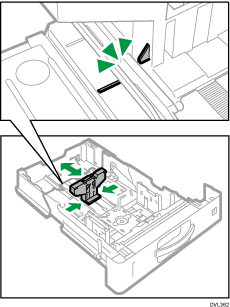
![]() Pinch the end fence and extend it.
Pinch the end fence and extend it.
![]()
When loading A4
 , 81/2 × 11
 or smaller paper, do not extend the tray. Otherwise, a paper jam may occur.
