![]() Press [Tray Paper Settings] in the upper left corner of the screen.
Press [Tray Paper Settings] in the upper left corner of the screen.
![]() Press [Paper Tray] tab.
Press [Paper Tray] tab.
![]() Select the tray to specify the paper settings.
Select the tray to specify the paper settings.
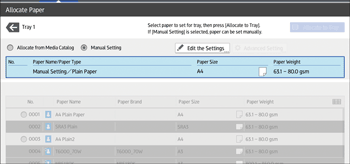
![]() Select [Allocate from Media Catalog].
Select [Allocate from Media Catalog].

The custom papers that can be used in the selected tray appear.
The Master Library information is indicated by the ![]() icon.
icon.
If the paper you want to select is not displayed, use [Jump to Row], or scroll through the screen until the desired item is displayed.
![]() Select the custom paper that you want to use, and then press [Allocate to Tray].
Select the custom paper that you want to use, and then press [Allocate to Tray].
After selecting a custom paper, you can check its type and color by pressing [Check Settings].
![]() Press [Cover/Designation/Slip/Separation Sheet] tab.
Press [Cover/Designation/Slip/Separation Sheet] tab.
![]() Change the settings for the copy function (such as front cover sheet and designation sheet), if necessary.
Change the settings for the copy function (such as front cover sheet and designation sheet), if necessary.
![]() Press [Home] (
Press [Home] (![]() ) at the bottom of the screen in the center.
) at the bottom of the screen in the center.
![]()
If you want to change the custom paper settings, press [Change Custom Paper Sett.] in Step 5.
