Original Orientation
This section explains how to correctly display the top/bottom orientation of scanned originals on a client computer screen.
Press [Original Feed Type].
Press [
 ] or [
 ] to select the same orientation as that of original.
Press [OK].
To correctly display the top/bottom orientation of the scanned original on a client computer, the placement of the original and the settings made on the control panel must match.
Place originals correctly by referring to the following tables:
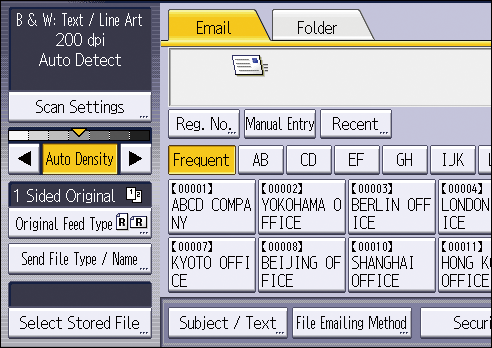
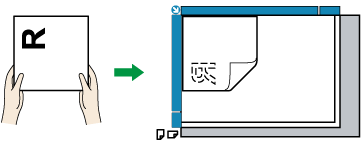
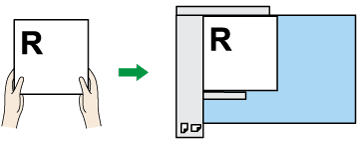
Exposure glass
Place the original face down on the exposure glass.
Original orientation and control panel key selection
Original orientation
Control panel key
Top edge touches rear of the exposure glass


Top edge touches left side of the exposure glass

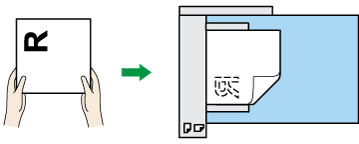
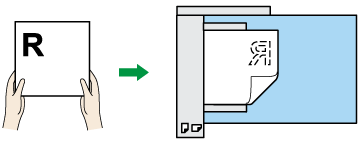
ADF
When placing an original in the ADF, whether to place the original face up or face down varies depending on the model. For details, see the User Guide of your device.
Original orientation and control panel key selection
Original orientation
Control panel key
Top edge touches rear of the ADF
or
Top edge touches left side of the ADF
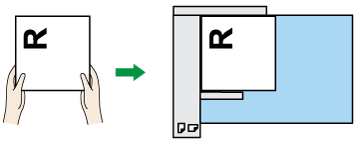
or

When you specify [Full Color: Text / Photo], [Full Color: Glossy Photo], [Gray Scale], or [Auto Color Select] in the [Original Type] tab under [Scan Settings], and single page TIFF/JPEG or multi-page TIFF is selected as the file type, see the tables below for how to place originals. Originals placed in orientations that are not recommended in the table might appear incorrectly top/bottom oriented on client computer displays.
Original orientation
Control panel key
Top edge touches left side of the exposure glass
Original orientation
Control panel key
Top edge touches left side of the ADF
or