The solution depends on the type of unevenness.
Carry out the appropriate procedure from those in the following table:
(A) The density is uneven across the entire image.Affected area | Solution |
|---|
The density from top to bottom is uneven. 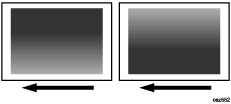
| In the 02: [Machine: Image Quality] group on the [Adjustment Settings for Operators] menu, select 0201: [Execute Image Quality Adjustment] and execute [Density Difference: Acr Fd]. If the problem persists, contact your service representative.
|
The sides are fainter or denser. 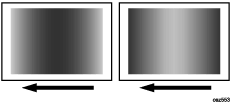
| In the 02: [Machine: Image Quality] group on the [Adjustment Settings for Operators] menu, select 0201: [Execute Image Quality Adjustment] and execute [Adjust Image Density]. If the problem persists, contact your service representative.
|
The top and bottom are fainter or denser. 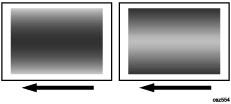
| In the 02: [Machine: Image Quality] group on the [Adjustment Settings for Operators] menu, select 0201: [Execute Image Quality Adjustment] and execute [Density Difference: Acr Fd]. If the problem persists, contact your service representative.
|
(B) The density is uneven in a part of the image.Affected area | Solution |
|---|
The leading edge is fainter. 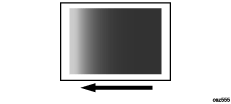
| In the 02: [Machine: Image Quality] group on the [Adjustment Settings for Operators] menu, select 0201: [Execute Image Quality Adjustment] and execute [Adjust Image Density]. If the problem persists, contact your service representative.
When thick paper is used, see Density Fluctuation at the Leading Edge (When Using Thick Paper). |
The trailing edge is fainter. 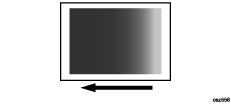
| In the 02: [Machine: Image Quality] group on the [Adjustment Settings for Operators] menu, select 0201: [Execute Image Quality Adjustment] and execute [Adjust Image Density]. If the problem persists, contact your service representative.
When thick paper is used, see Density Fluctuation at the Trailing Edge (When Using Thick Paper). |
The area within 90 mm (3.5 inches) of the trailing edge is fainter or denser. 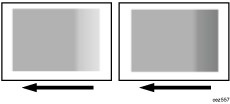
| In the 02: [Machine: Image Quality] group on the [Adjustment Settings for Operators] menu, select 0201: [Execute Image Quality Adjustment] and execute [Adjust Image Density]. If the problem persists, see Uneven Density within 127 mm (5 inches) from the Trailing Edge.
|
The center is fainter or denser 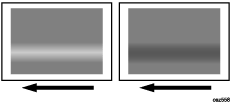
| In the 02: [Machine: Image Quality] group on the [Adjustment Settings for Operators] menu, select 0201: [Execute Image Quality Adjustment] and execute [Density Difference: Acr Fd]. If the problem persists, contact your service representative.
|
Wavy unevenness 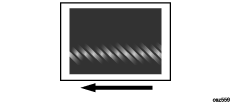
| In the 02: [Machine: Image Quality] group on the [Adjustment Settings for Operators] menu, select 0201: [Execute Image Quality Adjustment] and execute [Adjust Image Density]. If the problem persists, contact your service representative.
|
(C) The density is uneven in the direction perpendicular to the paper feed direction at regular intervals.Affected area | Solution |
|---|
Periodic vertical density fluctuation 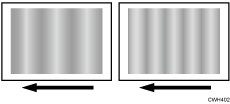
| Before performing this procedure, see White Spots (Half-tone Parts at Intervals of 310 mm). In the 05: [Machine: Maintenance] group on the [Adjustment Settings for Operators] menu, select 0508: [Execute Developer Refreshing]. <If uneven density occurs for black only> Execute [Black]. <If uneven density also occurs for colors other than black> Execute [All Colors]. Print the image. Has the problem been resolved? Yes: Finished! No: Go to the next step. In the 02: [Machine: Image Quality] group on the [Adjustment Settings for Operators] menu, select 0201: [Execute Image Quality Adjustment] and execute [Density Difference: With Fd]. If the problem persists, contact your service representative.
|


