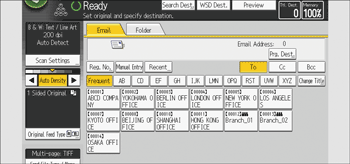
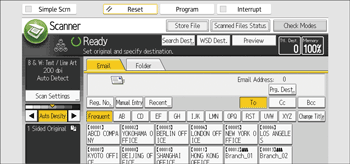
This section explains how to select the destination from the machine's address book.
![]()
To use this function, you must register the destinations in [System Settings] in advance. About the settings, see Device Management for details.
For details about registering destination folders in the machine's address book using SMB protocol, see Preparation for Sending by Scan to Folder.
You can use the following methods to select destinations registered in the machine's address book:
Select a destination from the list
Select a destination by entering the registration number
Select a destination by searching the machine's address book
Selecting a destination from the list
Select the destination from the destination list.
![]() In the destination list, press the key including the destination name.
In the destination list, press the key including the destination name.

The key of the selected destination is highlighted, and the destination appears in the destination field at the top of the screen.
![]()
If the target destination does not appear, display the destination by selecting its initial letter from the title.
Depending on the security setting, some destinations may not appear in the destination list.
Selecting destinations by entering the registration numbers
Select the destination from the machine's address book using its registration number.
![]() Press [Reg. No.].
Press [Reg. No.].

![]() Using the number keys, enter the five-digit registration number assigned to the required destination, and then press the [
Using the number keys, enter the five-digit registration number assigned to the required destination, and then press the [![]() ] key.
] key.
![]() Press [OK].
Press [OK].
Searching the machine's address book for the destination and selecting it
![]() Press [Search Dest.].
Press [Search Dest.].

![]() To search by destination name, press [Name]. To search by e-mail address, press [Email Address].
To search by destination name, press [Name]. To search by e-mail address, press [Email Address].
To search by folder name, select the [Folder] tab, and then press [Folder Name].
You can also search by combining [Name] and [Email Address].
![]() Enter the beginning of the destination name.
Enter the beginning of the destination name.
![]() Press [OK].
Press [OK].
![]() If necessary, press [Advanced Search] to specify the detailed search criteria, and then press [OK].
If necessary, press [Advanced Search] to specify the detailed search criteria, and then press [OK].
![]() Press [Start Search].
Press [Start Search].
Destinations that match the search criteria are displayed.
![]() Select a destination.
Select a destination.
To send the file by e-mail, select [To], [Cc], or [Bcc].
![]() Press [OK].
Press [OK].
![]()
If [LDAP Search] is set to [On] in [Administrator Tools] under [System Settings], check that [Address Book] has been selected before executing the search.
Search criteria that appear in [Advanced Search], such as [Name], [Email Address], and [Folder Name], are registered in the machine's address book. For details, see "Registering Addresses and Users", Device Management.
By pressing [Details], you can view details about the selected destinations.
Up to 100 destinations can be displayed as search results.
By pressing [Advanced Search], the following criteria appear:
[Beginning Word]: The names which start with the entered character or characters are targeted.
For example, to search for "ABC", enter "A".
[End Word]: The names which end with the entered character or characters are targeted.
For example, to search for "ABC", enter "C".
[Exact Match]: The names which correspond to an entered character or characters are targeted.
For example, to search for "ABC", enter "ABC".
[Include one Word]: The names which contain an entered character or characters are targeted.
For example, to search for "ABC", enter "A", "B", or "C".
[Exclude Words]: The names which do not contain an entered character or characters are targeted.
For example, to search for "ABC", enter "D".
When the specified destination is updated using the Central Management function, the spooled documents are sent to the destination after updating.
For details about Central Management, see "Administrator Tools", Device Management.
