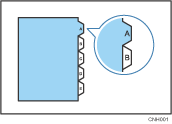
You can print on tab stock that has the index tab on its right edge.
To print on tab stock, specify the size of the tab stock in [Paper Size] under [Tray Paper Settings] using the control panel, and select [Tab Stock] in [Paper Type]. Then, specify the position of the index tab.
For details about [Tray Paper Settings], see "Changing Tray Paper Settings", Preparation.

![]()
For details about the optional units required for this function, see "Functions Requiring Optional Configurations", Device Management.
![]()
Be sure to check the position of the index tab beforehand, so that images to be printed do not come out slanted. If there are any letters in a position where the index tab is not present, toner may dirty the back of the paper.
If the position of the index tab conflicts with that of staples or punch holes, the position of the index tab will be prioritized.
For details about the sizes of tab stocks that can be printed, see "Recommended Paper Sizes and Types", Preparation.
Specify the position of the index tab in [Tray Paper Settings] using the control panel. To change the print position on the index tab, select [Machine Setting(s)] in [Tray Setting Priority] on the [System] tab for the corresponding tray under [Printer Features] using the control panel.
When you enable this function, the [Extended Auto Tray Switching] function will be disabled. For details about [Extended Auto Tray Switching], see "System", Preparation.
If you are printing on a registered custom paper, make the correct paper settings for the custom paper on the printer driver. For details about custom paper, see "Registering a Custom Paper", Preparation.
