![]() Press [Home] (
Press [Home] (![]() ) at the bottom of the screen in the center.
) at the bottom of the screen in the center.
![]() Press the [ID Card Scan and Copy] icon.
Press the [ID Card Scan and Copy] icon.
![]() Specify one or more destinations.
Specify one or more destinations.
You can specify up to six destinations, five from the destination list specified in the application’s features, and one selected from the Address Book of the machine or entered manually.

![]() Specify scan settings as necessary.
Specify scan settings as necessary.
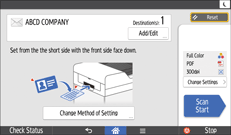
![]() Set the ID card into the ID Card Feeder front side down.
Set the ID card into the ID Card Feeder front side down.
![]() Press [Scan Start].
Press [Scan Start].
![]() If you want to print a copy of the scanned image, select [Send then print].
If you want to print a copy of the scanned image, select [Send then print].
Press [Print Setting] to change print settings as necessary.
![]() Press [Send].
Press [Send].
![]() If you want to scan another card, press [Continue Scanning]. To finish scanning, press [Exit].
If you want to scan another card, press [Continue Scanning]. To finish scanning, press [Exit].
When [Send then print] has been selected in Step 7, press [Print]. To finish without printing, press [Finish].
![]() Remove the original.
Remove the original.
![]()
To use the exposure glass to scan ID cards, press [Change Method of Setting], select [Place on Exposure Glass], and then press [OK].
