![]() Access the Adjustment Settings for Skilled Operators menu.
Access the Adjustment Settings for Skilled Operators menu.
See "Adjustment Settings for Skilled Operators", Adjustment Item Menu Guide: TCRU/ORU.
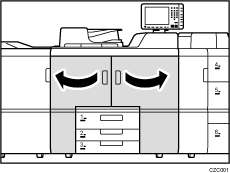
![]() Open the front covers.
Open the front covers.
![]() Remove the 3 screws.
Remove the 3 screws.

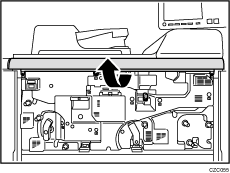
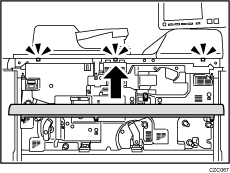
![]() Remove the cover.
Remove the cover.
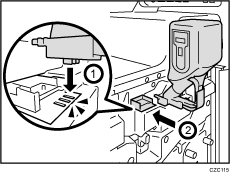
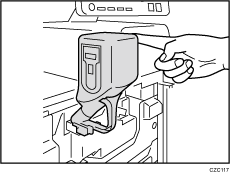
![]() Attach the developer bottle.
Attach the developer bottle.
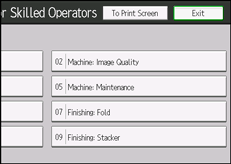
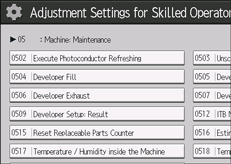
![]() Press [Machine: Maintenance].
Press [Machine: Maintenance].
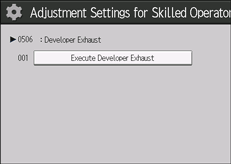
![]() Press [Developer Exhaust].
Press [Developer Exhaust].
![]() Press [Execute Developer Exhaust].
Press [Execute Developer Exhaust].
![]() Press [OK].
Press [OK].
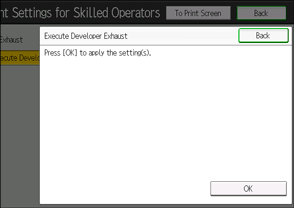
Discharge starts. It takes about 3 minutes.
![]() Check that developer discharge has completed, and then press [Exit].
Check that developer discharge has completed, and then press [Exit].
![]() Press [Back].
Press [Back].
![]() Press [Back].
Press [Back].
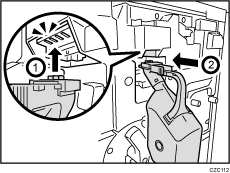
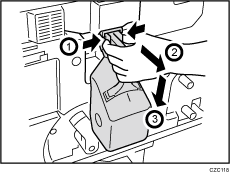
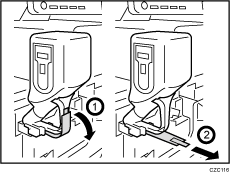
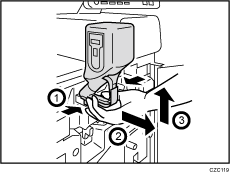
![]() Release the developer bottle's catch, and then remove the bottle.
Release the developer bottle's catch, and then remove the bottle.
![]() Remove the seal on the side of the bottle, and then affix it to the bottle's opening.
Remove the seal on the side of the bottle, and then affix it to the bottle's opening.
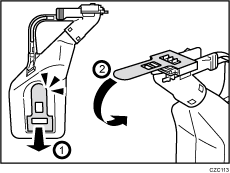
![]() Turn the new developer bottle a few times to loosen the developer.
Turn the new developer bottle a few times to loosen the developer.
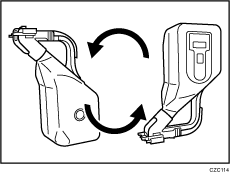
![]() Attach the new developer bottle.
Attach the new developer bottle.
![]() Pull out the seal.
Pull out the seal.
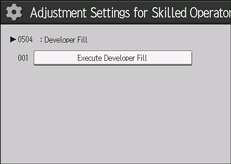
![]() Press [Developer Fill].
Press [Developer Fill].
![]() Press [Execute Developer Fill].
Press [Execute Developer Fill].
![]() Press [OK].
Press [OK].
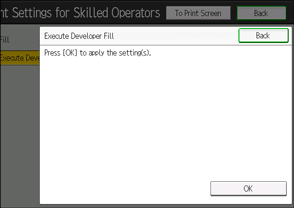
Replenishment starts. It takes about a minute.
![]() While pouring in the developer, tap the bottle a few times so that no developer is left in the bottle.
While pouring in the developer, tap the bottle a few times so that no developer is left in the bottle.
![]() Check that developer replenishment has completed, and then press [Exit].
Check that developer replenishment has completed, and then press [Exit].
![]() Press [Back].
Press [Back].
![]() Press [Back].
Press [Back].
![]() Release the developer bottle's catch, and then remove the bottle.
Release the developer bottle's catch, and then remove the bottle.
Keep the bottle.
![]() Attach the cover by aligning it with the 3 catches.
Attach the cover by aligning it with the 3 catches.
![]() Secure the cover with the 3 screws.
Secure the cover with the 3 screws.

![]() Reset the counter for replaceable parts.
Reset the counter for replaceable parts.