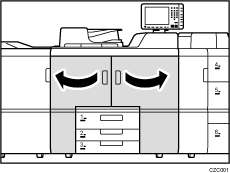
![]() Open the front covers.
Open the front covers.
![]() Pull open the tray until it stops.
Pull open the tray until it stops.
Remove any paper in the tray.

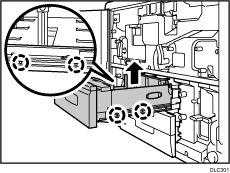
![]() Remove the four screws, and then lift the inner tray out of the drawer.
Remove the four screws, and then lift the inner tray out of the drawer.
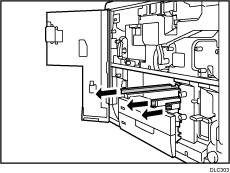
![]() Push the guide rails back into the machine.
Push the guide rails back into the machine.
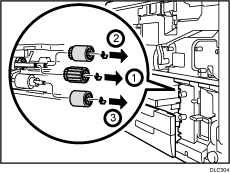
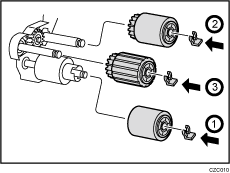
![]() Remove the paper feed roller in the following order:
Remove the paper feed roller in the following order:
(1) Snap ring and pick-up roller
(2) Snap ring and feed roller
(3) Snap ring and separation roller
![]() Attach the new paper feed roller in the following order:
Attach the new paper feed roller in the following order:
(1) Separation roller and snap ring
(2) Feed roller and snap ring
(3) Pick-up roller and snap ring
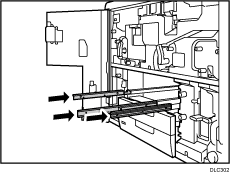
![]() Pull out the guide rails.
Pull out the guide rails.
![]() Attach the inner tray, align it with the screw holes in the left and right guide rails, and secure it with the four screws.
Attach the inner tray, align it with the screw holes in the left and right guide rails, and secure it with the four screws.
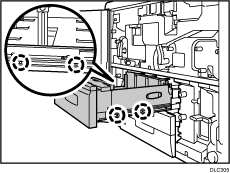
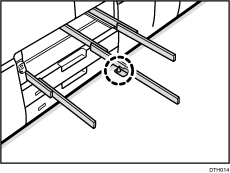
When putting the tray on the guide rails, align the hole in the bottom of the tray with the pin on the center rail.
![]() Push the tray back into the machine.
Push the tray back into the machine.
![]() Reset the counter for replaceable parts.
Reset the counter for replaceable parts.
Do not turn the machine on until you have read how to do so.