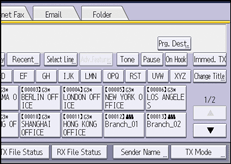
![]() Press [TX Mode].
Press [TX Mode].

![]() Select [Option Setting].
Select [Option Setting].
![]() Press [Fax Header Print].
Press [Fax Header Print].
![]() Make sure that [Set] is selected.
Make sure that [Set] is selected.
![]() Press [Fax Header], and then select fax header that you want to use.
Press [Fax Header], and then select fax header that you want to use.
![]() Press [OK] four times.
Press [OK] four times.
![]()
You can specify whether or not dates, fax header names, file numbers, or page numbers are printed by changing their respective User Parameters (switch 18, bit 3, 2, 1, 0) in the Fax Features menu. See Parameter Settings.
When using Parallel Memory Transmission, only the page number is printed on the header of the fax and the total number of originals is not printed.
 (mainly Europe and Asia)
In some cases, you may want the other party to receive an unmarked copy of your original. To do this, switch fax header off. (mainly North America)
In the USA, law requires that your telephone number be included in the fax header. Register the telephone number (own fax number) and switch on Fax Header Print with User Parameters (switch 18, bit 1) in the Fax Features menu.
