You can adjust the printing position.
You can set this menu when you log in as an administrator.
"Horizontal" means perpendicular to the feed direction.
![]() Press [Adjust Print Position] on the [Maintenance: Image] screen.
Press [Adjust Print Position] on the [Maintenance: Image] screen.
For details about how to access the [Maintenance: Image] screen, see page Accessing User Tools.
Press [![]() ] to switch the screen.
] to switch the screen.
![]() Press [Print Test Sheet].
Press [Print Test Sheet].
![]() Select the tray you want to adjust.
Select the tray you want to adjust.
![]() Print the test sheet to preview the settings.
Print the test sheet to preview the settings.
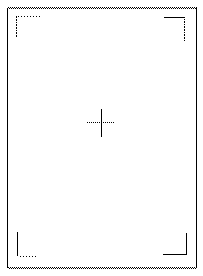
Use this sheet to confirm the current print position.
![]() Press [Exit].
Press [Exit].
![]() Press [Adjust Position].
Press [Adjust Position].
![]() Select the tray you want to adjust.
Select the tray you want to adjust.
![]() Enter to change the registered value (mm).
Enter to change the registered value (mm).
Increase the value to shift the print area in the direction indicated by the "+" symbol in the diagram below. Decrease to shift the print area in the direction indicated by the "-" symbol.
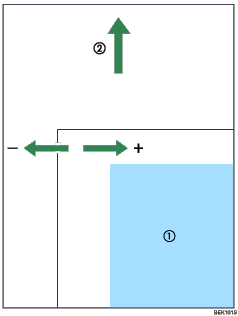
![]() : Print Area
: Print Area
![]() : Paper Feed Direction
: Paper Feed Direction
![]() Press [OK].
Press [OK].
![]() Press [Exit].
Press [Exit].
![]() Print the test sheet to confirm the adjustment result.
Print the test sheet to confirm the adjustment result.
![]() Press [Exit] twice.
Press [Exit] twice.
![]() Press [Home] (
Press [Home] (![]() ) at the bottom of the screen in the center.
) at the bottom of the screen in the center.