This section describes how to register names.
![]() Press [Home] (
Press [Home] (![]() ) at the bottom of the screen in the center.
) at the bottom of the screen in the center.
![]() Flick the screen to the left, and then press the [Address Book Management] icon.
Flick the screen to the left, and then press the [Address Book Management] icon.
![]() Check that [Program / Change] is selected.
Check that [Program / Change] is selected.
![]() Press [New Program].
Press [New Program].
![]() Press [Change] under "Name".
Press [Change] under "Name".
The name entry display appears.
![]() Enter the name, and then press [OK].
Enter the name, and then press [OK].
![]() Press [
Press [![]() Next].
Next].
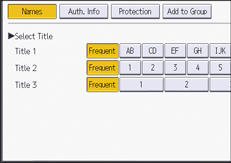
![]() Press the key for the classification you want to use under "Select Title".
Press the key for the classification you want to use under "Select Title".

The keys you can select are as follows:
[Frequent]: Added to the page that is displayed first.
[AB], [CD], [EF], [GH], [IJK], [LMN], [OPQ], [RST], [UVW], [XYZ], [1] to [10]: Added to the list of items in the selected title.
You can select [Frequent] and one more key for each title.
![]() Press [OK].
Press [OK].
![]() Press [User Tools] (
Press [User Tools] (![]() ) on the top right of the screen.
) on the top right of the screen.
![]() Press [Home] (
Press [Home] (![]() ) at the bottom of the screen in the center.
) at the bottom of the screen in the center.
