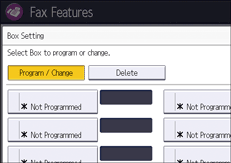
This section describes how to set up a Transfer Box.
You can store the following items:
Box Name (required)
Up to 20 characters.
SUB Code (required)
Up to 20 characters long and can be composed of digits [0]–[9], [
 ], [
], [ ], and spaces (the first character cannot be a space).
End Receiver (required)
You can store five end receivers for each box. Select end receivers from the Address Book. For the maximum number of destinations you can register in a group, see Maximum Values. The total number of registered end receivers cannot exceed the maximum.
You can set the fax, IP-Fax, Internet Fax, e-mail, folder, or Colud Fax destination, as a reception station.
Password (optional)
Up to 20 characters long and can be composed of digits [0]–[9], [
 ], [
], [ ], and spaces (the first character cannot be a space).
When programming a password, a mark is displayed in front of the box name.
You can edit boxes in the same way you program them.
For details about this function, see Transferring Received Documents.
![]() Press [Fax Features].
Press [Fax Features].
![]() Press [General Settings].
Press [General Settings].
![]() Press [Box Setting].
Press [Box Setting].
![]() Check that [Program / Change] is selected.
Check that [Program / Change] is selected.
![]() Select the box to program.
Select the box to program.
When programming a new box, press [Not Programmed].

To change a box already programmed, press it, and then proceed to Step 8. If a password is programmed, enter the password, and then press [OK].
![]() Press [Transfer Box].
Press [Transfer Box].
![]() Enter a box name, and then press [OK].
Enter a box name, and then press [OK].
![]() Enter a SUB Code using the number keys.
Enter a SUB Code using the number keys.
To change the SUB Code, press [Clear], and then try again. To change box name, press [Box Name], and then repeat from Step 7.
![]() To program end receivers, select a receiving station 1–5.
To program end receivers, select a receiving station 1–5.
![]() Specify end receivers with destination keys, and then press [OK].
Specify end receivers with destination keys, and then press [OK].
Press [Fax], [Internet Fax], [Email], or [Folder] to switch the transmission type.
You can also specify a Cloud Fax destination displayed in the [Fax] tab.
![]() Specify a password as necessary.
Specify a password as necessary.
Press [Password], enter a password using the number keys, and then press [OK]. Re-enter the password for confirmation, and then press [OK].
![]() When you specify an Internet Fax or e-mail destination as end receivers, configure the settings in [Security] as necessary.
When you specify an Internet Fax or e-mail destination as end receivers, configure the settings in [Security] as necessary.
To encrypt e-mails, press [Encryption].
To attach a signature to an e-mail, press [Signature].
After configuring the settings, press [OK].
![]() Press [OK].
Press [OK].
![]() Press [Exit] twice.
Press [Exit] twice.
![]()
For details about the [Security] setting, see Encryption and Signature for Internet Fax/E-Mail.
