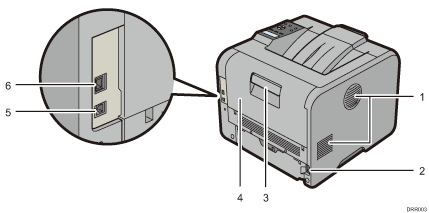
Exhaust vent
Releases hot air from the printer's interior to prevent internal components overheating.
The direction of exhaust from this vent can be adjusted. Do not block or obstruct the printer's vents. Doing so can result in malfunctions caused by build up of heat inside the printer.
Power connector
Connect the power cord to the printer. Insert the other end into an electrical outlet.
Rear cover open lever
Pull this lever to open the rear cover.
Rear cover
Open to access the inside of the printer.
Open here to replace the fusing unit or using the envelope lever.
USB port B
Use a USB cable to connect the printer to a computer.
Ethernet port
Use a network interface cable to connect the printer to a network.