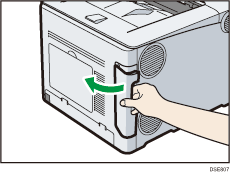
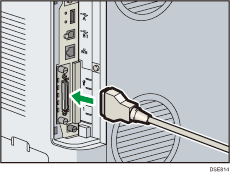
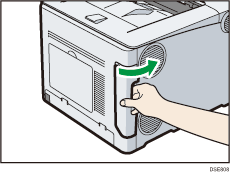
This section explains how to connect an IEEE 1284 interface cable to the IEEE 1284 interface board.
![]()
If the main power switch is on, turn it off.
For connection to the IEEE 1284 interface board, use a half pitch 36-pin interface cable.
![]() Make sure the main power switch on the printer is off.
Make sure the main power switch on the printer is off.
![]() Turn off the main power switch of the host computer.
Turn off the main power switch of the host computer.
![]() Remove the cable cover.
Remove the cable cover.

![]() Connect an IEEE 1284 interface cable to the IEEE 1284 port.
Connect an IEEE 1284 interface cable to the IEEE 1284 port.

You might have to use a conversion adapter to connect the cable to the interface. For details about acquiring a conversion adapter, contact your sales or service representative.
![]() Connect the other end of the cable into the interface connector on the host computer.
Connect the other end of the cable into the interface connector on the host computer.
Before connecting the cable to the computer, check the shape of the connector. Connect the cable firmly.
![]() Attach the cable cover.
Attach the cable cover.

![]() Turn on the main power switch of the printer.
Turn on the main power switch of the printer.
![]() Turn on the host computer.
Turn on the host computer.
If Windows operating system is used, a printer driver installation screen might appear when the computer is turned on. If this happens, click [Cancel] on the screen.
![]()
This printer does not come with an IEEE 1284 interface cable. Make sure you purchase the appropriate cable for the printer (connector shape) and your computer.
Use a five meter (16.4 foot) or shorter IEEE 1284 compatible cable that is compatible with the host computer.
