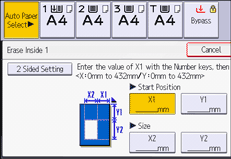
![]() Specify the base point of the area (X1, Y1) and the size of the area (X2, Y2).
Specify the base point of the area (X1, Y1) and the size of the area (X2, Y2).
Each value can be specified in a range from 0 to 432 mm (0.0 to 17.0 inches).
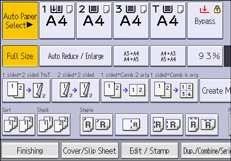
![]() Press [Edit / Stamp].
Press [Edit / Stamp].

![]() Press [Erase].
Press [Erase].
![]() Select one of the areas from [Erase Inside 1] to [Erase Inside 5].
Select one of the areas from [Erase Inside 1] to [Erase Inside 5].
![]() Enter the length of [X1] with the number keys, and then press [
Enter the length of [X1] with the number keys, and then press [![]() ].
].

![]() Enter the length of [Y1] with the number keys, and then press [
Enter the length of [Y1] with the number keys, and then press [![]() ].
].
![]() Enter the length of [X2] with the number keys, and then press [
Enter the length of [X2] with the number keys, and then press [![]() ].
].
![]() Enter the length of [Y2] with the number keys, and then press [
Enter the length of [Y2] with the number keys, and then press [![]() ].
].
If you want to erase the image on the back side of the original, press [2 Sided Setting], and then press [Back Side].
Erasing the image on the back side is valid when you copy two-sided originals.
![]() Press [OK].
Press [OK].
To specify multiple areas, repeat steps 4 to 9.
![]() Press [OK].
Press [OK].
![]()
By combining [Erase Inside 1]–[Erase Inside 5], you can erase up to five areas at the same time.
