The paper size setting is changed in the same way for every paper tray.
![]() Carefully pull out the paper roll tray until it stops.
Carefully pull out the paper roll tray until it stops.
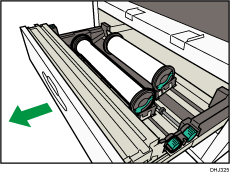
![]() Holding both sides of the paper roll to replace, remove it from the paper roll tray.
Holding both sides of the paper roll to replace, remove it from the paper roll tray.
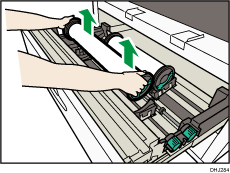
Remove both sides.
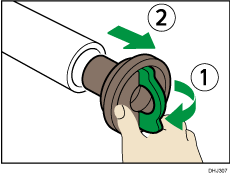
![]() Raise the lever on the paper holder (
Raise the lever on the paper holder (![]() ), and then remove the empty paper roll core (
), and then remove the empty paper roll core (![]() ).
).
![]() Attach the paper holder to the new paper roll (
Attach the paper holder to the new paper roll (![]() ), and then lower the lever (
), and then lower the lever (![]() ).
).
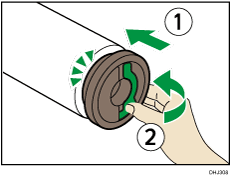
Insert the paper holder firmly, until stops.
![]() Hold both sides of the paper roll and set it securely in the roll holder.
Hold both sides of the paper roll and set it securely in the roll holder.
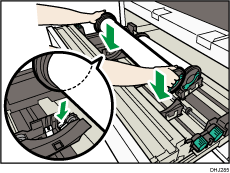
Make sure that both ends of the paper holder are securely seated in the grooves of the roll holder.
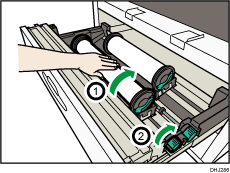
The edge of the paper roll should be on the bottom.
![]() While rotating the paper roll slowly (
While rotating the paper roll slowly (![]() ) to feed the edge of the paper roll into the rubber part of the roller, turn the paper feed knob clockwise (
) to feed the edge of the paper roll into the rubber part of the roller, turn the paper feed knob clockwise (![]() ).
).
![]() Keep pressing the auto feed button until the edge of the paper emerges from the cutter section (
Keep pressing the auto feed button until the edge of the paper emerges from the cutter section (![]() ), and then remove the cut piece of paper (
), and then remove the cut piece of paper (![]() ).
).
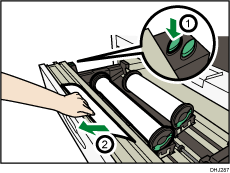
The paper will be cut automatically when you release the feed button.
Be careful not to get your fingers or cloths trapped in the roller.
![]() Carefully push the paper roll tray fully in.
Carefully push the paper roll tray fully in.
![]()
Depending on the paper type, the paper core may be difficult to pull out if it is caught on the claw of the paper holder. If this happens, raise the lever, and then hold the paper holder while turning from side to side two or three times. Then gently pull out the paper roll core.
