![]()
Check the paper edges are aligned at the right side.
If a paper tray is pushed vigorously when putting it back into place, the position of the tray's side fences may slip out of place.
When loading a low number of sheets, be sure not to squeeze the side fences in too tightly. If the side fences are squeezed too tightly against the paper, the edges may crease, thin paper may wrinkle, or the paper may misfeed.
When you load paper in the cassette, be sure not to add the new paper onto the old one.
When loading thin or translucent paper, be sure to load the paper in the grain direction. (Load thin or translucent paper from the bypass tray in the grain direction.)
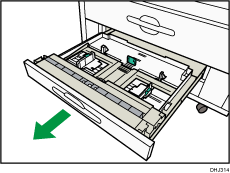
![]() Pulling out the cut paper tray.
Pulling out the cut paper tray.
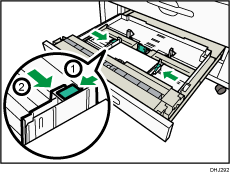
![]() Release the side lever to the unlocked position.
Release the side lever to the unlocked position.

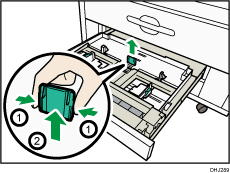
![]() While pressing its sides, pull out the back fence.
While pressing its sides, pull out the back fence.
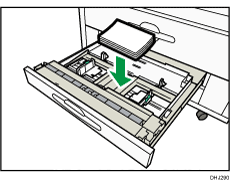
![]() Load paper print face down.
Load paper print face down.
![]() Reinsert the back fence at the position that corresponds to the size of the paper you want to load.
Reinsert the back fence at the position that corresponds to the size of the paper you want to load.
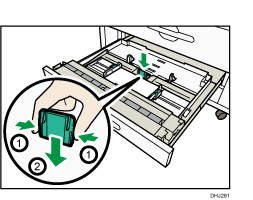
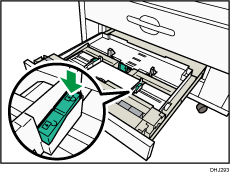
![]() While pressing the release lever, adjust the side fences to the paper size.
While pressing the release lever, adjust the side fences to the paper size.
![]() Lock the side lever.
Lock the side lever.
![]() Close the cut paper tray.
Close the cut paper tray.
![]()
If the paper roll is not loaded correctly, the back surface of the copy may be stained.