Adjust the deviation.
The multi-folding unit has three adjusting screws (L1, L2, and L3) to adjust deviation.
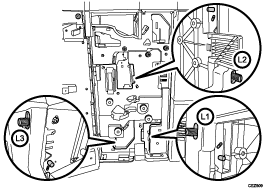
L1
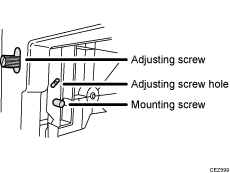
L2
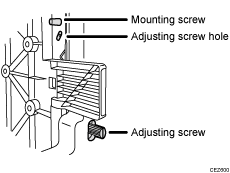
L3
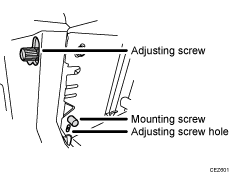
The screws adjust the folding deviations of the following parts:
Z-fold
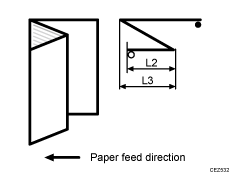
Half Fold
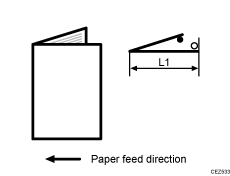
Letter Fold-in
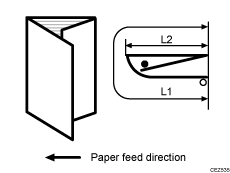
Letter Fold-out
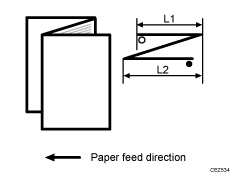
Double Parallel
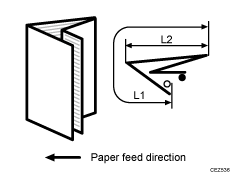
Gate Fold
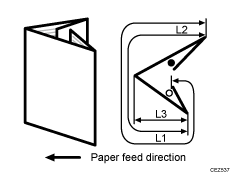
The ![]() mark indicates the leading edge (relative to the paper feed direction), and the
mark indicates the leading edge (relative to the paper feed direction), and the ![]() mark indicates the trailing edge.
mark indicates the trailing edge.
<How to adjust the folding deviation>
This procedure is the same for L1, L2, and L3.
![]() Open the front cover of the multi-folding unit.
Open the front cover of the multi-folding unit.
![]() Remove the mounting screw.
Remove the mounting screw.
If the mounting screw is attached to the adjusting screw hole, unfasten it.
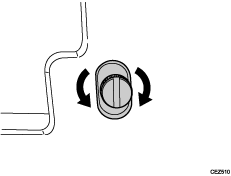
![]() Turn the adjusting screw to adjust the deviation.
Turn the adjusting screw to adjust the deviation.
To increase the length at the bottom part of paper, turn the screw clockwise.
To decrease the length at the bottom part of paper, turn the screw counterclockwise.
![]() Attach the mounting screw to fasten the adjusting screw.
Attach the mounting screw to fasten the adjusting screw.
If the mounting screw is attached to the adjusting screw hole, fasten it.
![]() Close the front cover of the multi-folding unit.
Close the front cover of the multi-folding unit.
![]()
For multi-sheet folding, the folding deviation that appears in the center of paper will be adjusted.
If the deviation is large, the paper may be skewed. For further information, about skewing, see "Details of Menu Items in Advanced Settings", Adjustment Item Menu Guide.
