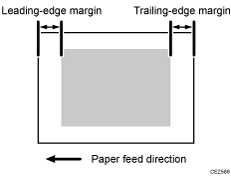
Depending on the paper being used, the margins on the copy vary. You can shorten the leading/trailing edge margins.

![]()
To adjust the following settings, pre-register the type of paper in use as a custom paper. For details about registering custom papers, see "Registering a Custom Paper", Paper Settings.
![]() In [Advanced Settings] for the custom paper you are using, adjust the leading/trailing edge margins.
In [Advanced Settings] for the custom paper you are using, adjust the leading/trailing edge margins.
<Printing in full color/Printing in black and white/Printing in full color including the clear toner while the special color is not set to high quality>
Reduce the value by 0.5 mm in 009: [Adj. Erase Margin of Leadg. Edge: Prod.] or 011: [Adj. Erase Marg. Of Trailg. Edge: Prod.].
<Printing in full color including the clear toner and the special color is set to high quality/printing in full color including the white toner>
Reduce the value by 0.5 mm in 010: [Adj. Erase Margin of Leadg. Edge: Qual.] or 012: [Adj. Erase Marg. Of Trailg. Edge: Qual.].
![]() Keep reducing the value by 0.5 mm, checking that paper is not jammed.
Keep reducing the value by 0.5 mm, checking that paper is not jammed.
![]()
The adjusted margin cannot be applied to masked images that are solid-filled or contain ruled lines at the leading/trailing edges.
Reducing the leading/trailing edge margin may result in a paper jam on the fusing belt stripper plate.
