![]()
This function is available for Pro C7100X, Pro C7110X, Pro C7100SX, and Pro C7110SX.
![]() Turn the machine on.
Turn the machine on.
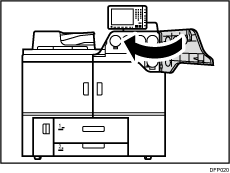
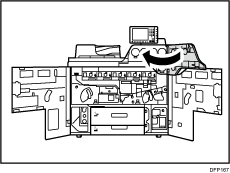
![]() Open the cover.
Open the cover.

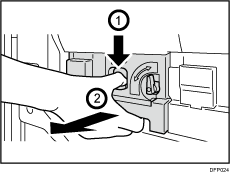
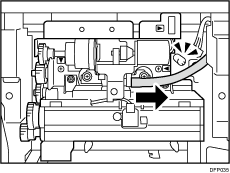
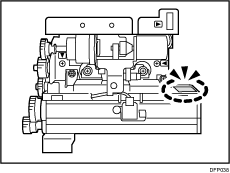
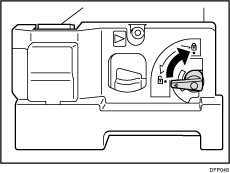
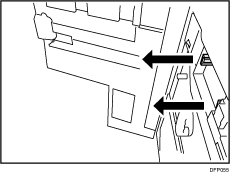
![]() Pull the lever to the left.
Pull the lever to the left.
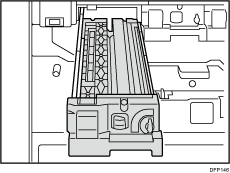
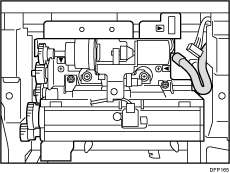
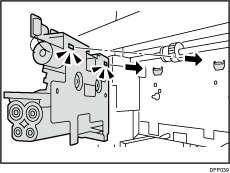
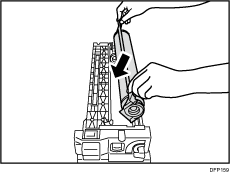
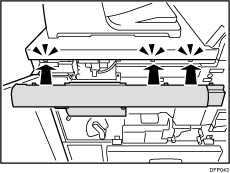
![]() Pull out the toner bottle.
Pull out the toner bottle.
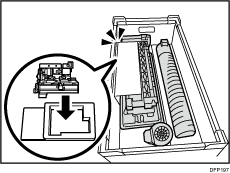
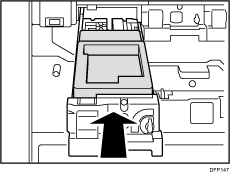
![]() Attach the Fifth Station Toner Cartridge Replacement Tool.
Attach the Fifth Station Toner Cartridge Replacement Tool.
![]() Close the cover.
Close the cover.
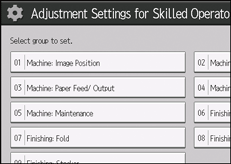
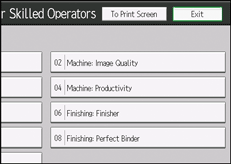
![]() Access the Adjustment Settings for Skilled Operators menu.
Access the Adjustment Settings for Skilled Operators menu.
See "Adjustment Settings for Skilled Operators", Adjustment Item Menu Guide: TCRU/ORU.
![]() Press [Machine: Maintenance].
Press [Machine: Maintenance].
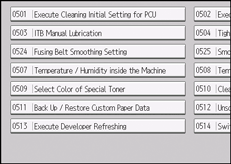
![]() Press [Select Color of Special Toner].
Press [Select Color of Special Toner].
![]() Press [Select Color of Special Toner].
Press [Select Color of Special Toner].
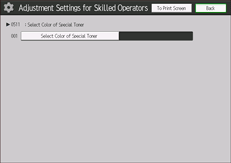
![]() Select the toner you want to change, and then press [OK].
Select the toner you want to change, and then press [OK].
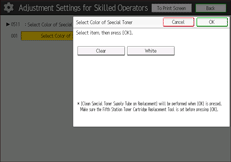
![]() Press [Exit].
Press [Exit].

![]() Turn off the power.
Turn off the power.
![]() Open the cover.
Open the cover.
![]() Pull the lever to the left.
Pull the lever to the left.
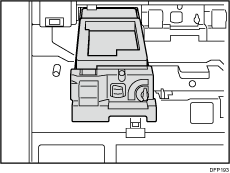
![]() Pull out the Fifth Station Toner Cartridge Replacement Tool.
Pull out the Fifth Station Toner Cartridge Replacement Tool.
![]() Attach the new toner bottle.
Attach the new toner bottle.
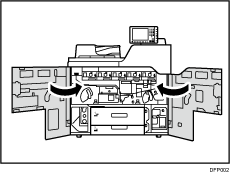
![]() Open the front covers.
Open the front covers.

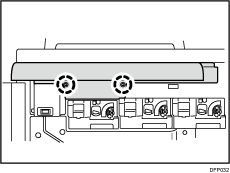
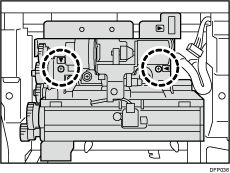
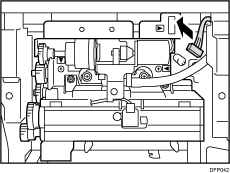
![]() Remove the 2 screws.
Remove the 2 screws.
![]() Remove the cover.
Remove the cover.

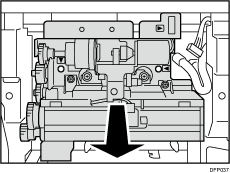
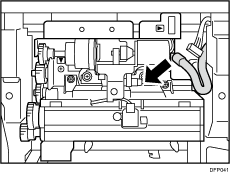
![]() Remove the screw.
Remove the screw.
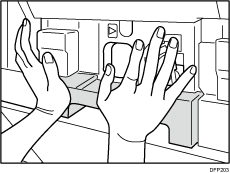
![]() Push down on the lock lever and pull the PCDU out until it stops.
Push down on the lock lever and pull the PCDU out until it stops.
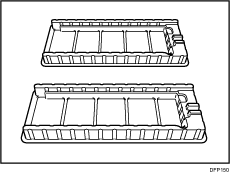
![]() Remove the sub-hopper plate from the storage box.
Remove the sub-hopper plate from the storage box.
![]() Place the sub-hopper plate on the development unit.
Place the sub-hopper plate on the development unit.
![]() Push the development unit into the machine until the sub-hopper plate comes into contact with the development unit.
Push the development unit into the machine until the sub-hopper plate comes into contact with the development unit.
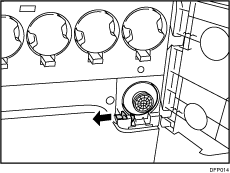
![]() Remove the connector.
Remove the connector.
![]() Take off the tube, and then push it into the protrusion.
Take off the tube, and then push it into the protrusion.
![]() Remove the 2 screws.
Remove the 2 screws.
![]() Remove the sub-hopper unit.
Remove the sub-hopper unit.
Place it on the sub-hopper plate.
![]() Remove the new sub-hopper unit from the storage box, and then attach it.
Remove the new sub-hopper unit from the storage box, and then attach it.
Install the sub-hopper unit, so that the sealprint side faces up.
![]() Secure the sub-hopper unit with the 2 screws.
Secure the sub-hopper unit with the 2 screws.

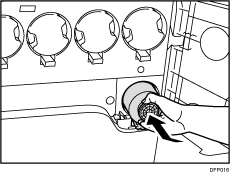
![]() Attach the tube.
Attach the tube.
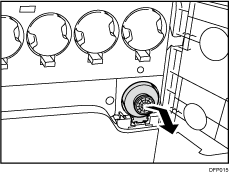
![]() Attach the connector.
Attach the connector.
Make sure that the connector is securely attached.
Otherwise, the following may occur:
Image density may become faint.
It may take longer than usual to adjust the machine.
![]() Remove the sub-hopper plate.
Remove the sub-hopper plate.
Place it on a flat clean surface.
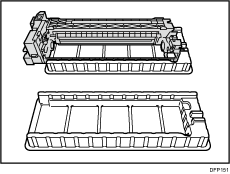
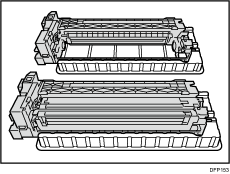
![]() Remove two development plates from the storage box, and then place them on a flat surface.
Remove two development plates from the storage box, and then place them on a flat surface.
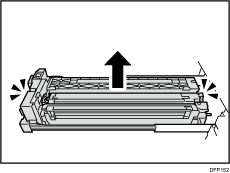
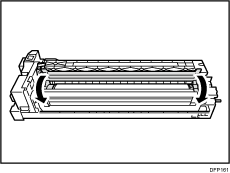
![]() Remove the development unit from the storage box, and then place it on the development plate.
Remove the development unit from the storage box, and then place it on the development plate.
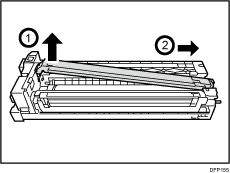
![]() Push the lever to the rear to release it, and then pull it up.
Push the lever to the rear to release it, and then pull it up.
![]() Turn the lock lever down to unlock the PCU cleaning unit.
Turn the lock lever down to unlock the PCU cleaning unit.
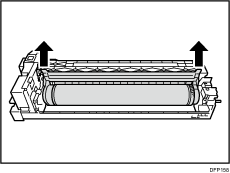
![]() Remove the development unit from the main machine, and then place it on the development plate.
Remove the development unit from the main machine, and then place it on the development plate.
![]() Push the guide rail back into the machine.
Push the guide rail back into the machine.
![]() Push the lever to the rear to release it, and then pull it up.
Push the lever to the rear to release it, and then pull it up.
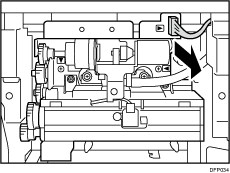
![]() Remove the charger unit.
Remove the charger unit.
Place it on a flat clean surface.
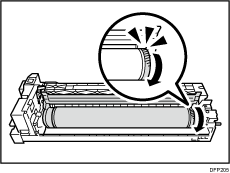
![]() Rotate the handle.
Rotate the handle.
![]() Turn the lock lever down to unlock the PCU cleaning unit.
Turn the lock lever down to unlock the PCU cleaning unit.
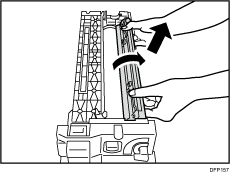
![]() Remove the PCU cleaning unit.
Remove the PCU cleaning unit.
Place it on a flat clean surface.
![]() Remove the photoconductor unit, and then attach it to the new development unit.
Remove the photoconductor unit, and then attach it to the new development unit.
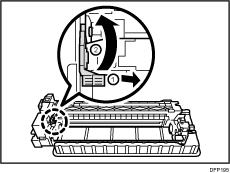
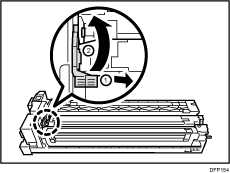
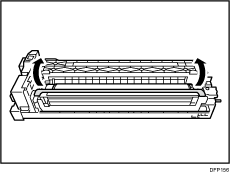
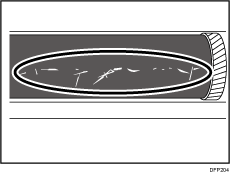
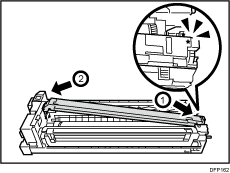
![]() Hold the flange of the photoconductor unit and rotate it toward yourself by 30 degrees.
Hold the flange of the photoconductor unit and rotate it toward yourself by 30 degrees.
Make sure that the part shown is not jammed between the PCU cleaning unit.
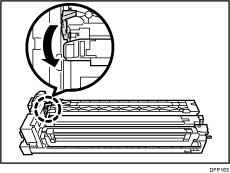
![]() Attach the PCU cleaning unit.
Attach the PCU cleaning unit.
![]() Pull up the lock lever to lock the PCU cleaning unit.
Pull up the lock lever to lock the PCU cleaning unit.
![]() Rotate the handle.
Rotate the handle.
![]() Attach the charger unit.
Attach the charger unit.
![]() Pull down the charger unit lock lever to the locked position.
Pull down the charger unit lock lever to the locked position.
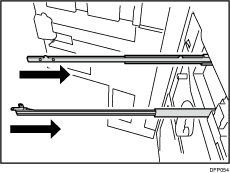
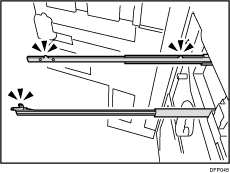
![]() Pull out the guide rails.
Pull out the guide rails.
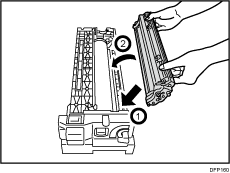
![]() Attach the development unit.
Attach the development unit.

![]() Push the PCDU into the machine.
Push the PCDU into the machine.
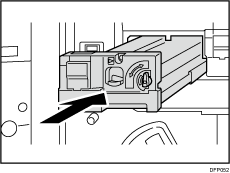
Push it in slowly until it clicks.
Do not push the upper or center part of the PCDU.
![]() Secure the PCDU with the screw.
Secure the PCDU with the screw.

![]() Attach the cover by aligning it with the 3 catches.
Attach the cover by aligning it with the 3 catches.
![]() Secure the cover with the 2 screws.
Secure the cover with the 2 screws.

![]() Close the cover.
Close the cover.
![]() Close the front covers.
Close the front covers.
![]() Turn the machine on.
Turn the machine on.
![]() Access the Adjustment Settings for Skilled Operators menu.
Access the Adjustment Settings for Skilled Operators menu.
See "Adjustment Settings for Skilled Operators", Adjustment Item Menu Guide: TCRU/ORU.
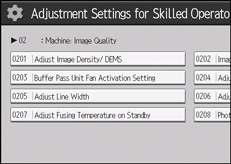
![]() Press [Machine:Image Quality].
Press [Machine:Image Quality].
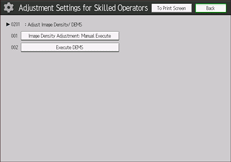
![]() Press [Adjust Image Density/ DEMS].
Press [Adjust Image Density/ DEMS].
![]() Press [Execute DEMS].
Press [Execute DEMS].
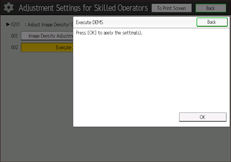
![]() Press [OK].
Press [OK].
![]() Press [Exit].
Press [Exit].
![]() Press the [Fiery] key.
Press the [Fiery] key.
![]() Press the [Fiery] tab.
Press the [Fiery] tab.
![]() Press [Restart Fiery], and then press [Shut Down].
Press [Restart Fiery], and then press [Shut Down].
![]() Press [OK].
Press [OK].
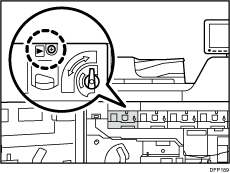
![]() Press the operation switch.
Press the operation switch.
![]() Make sure the operation switch indicator is not lit.
Make sure the operation switch indicator is not lit.
![]() Open the front left cover.
Open the front left cover.
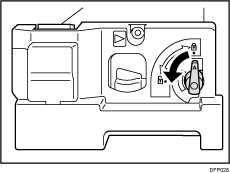
![]() Turn off the AC power switch.
Turn off the AC power switch.
For details about the AC power switch, see "Dos and Don'ts", About This Machine.
![]() Close the front left cover.
Close the front left cover.
After turning off the main power switch, wait for two minutes or more before turning it on again.
![]() Open the front left cover.
Open the front left cover.
![]() Turn on the AC power switch.
Turn on the AC power switch.
For details about the AC power switch, see "Dos and Don'ts", About This Machine.
![]() Close the front left cover.
Close the front left cover.
![]() Press the operation switch.
Press the operation switch.
![]() Put the removed parts in the storage box.
Put the removed parts in the storage box.