If a misfeed occurs, remove the jammed paper by following the procedures indicated in the animation that appears on the screen and the sticker or sheet inside the front cover.
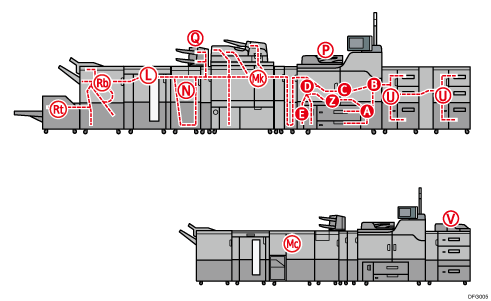
A misfeed has occurred in the place corresponding to the letter displayed on the control panel.
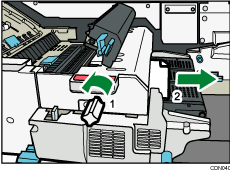
![]() Remove the jammed paper by following the procedures that are displayed on the screen.
Remove the jammed paper by following the procedures that are displayed on the screen.
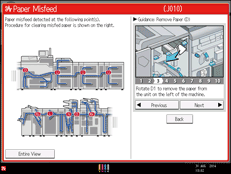
When [Next] or [Previous] is displayed on the screen.
After each step is complete, press [Next]. To go back to the previous step, press [Previous].
![]() When the jammed paper is removed, restore the machine to the original state.
When the jammed paper is removed, restore the machine to the original state.
![]()
Multiple paper misfeed locations may be indicated at the same time. When this happens, check all the areas indicated.
If there is no misfed paper in the area you check first, see the other areas that are indicated.
If coated paper frequently becomes jammed and causes "U" to appear, contact your service representative.
If a paper misfeed occurs in Rb1 - Rb5, check whether any paper has been output on top of the paper press of the finisher shift tray. If there is paper on top of the paper press, remove the paper, and then remove the misfed paper from inside the finisher.
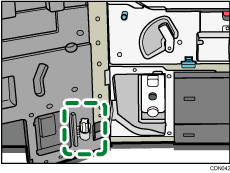
If "D" is displayed and you cannot remove the misfed paper from the right side of the fusing unit, use the knob located on the inside of the left front cover.
Pull out the knob located on the inside of the left front cover.
Align the knob with the slot on the fusing unit, and then insert it.
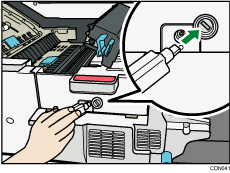
Turn the knob counterclockwise until the misfed paper comes out from the right side of the fusing unit, and then remove it.
Return the knob to its original position.