![]()
Before performing this procedure, refer to Preparing to Send by Scan to Folder and confirm the details of the destination computer. Also refer to "Registering Folders", Connecting the Machine/System Settings, and register the address of the destination computer to the address book.
![]() Press [Scanner]
Press [Scanner]

![]() Make sure that no previous settings remain
Make sure that no previous settings remain
If a previous setting remains, press the [Reset] key.
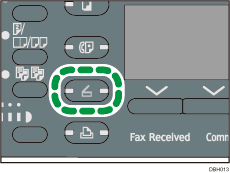
![]() If the E-mail screen is displayed, press [
If the E-mail screen is displayed, press [![]() ] to switch to the Scan to Folder screen
] to switch to the Scan to Folder screen

![]() Place originals
Place originals
![]() If necessary, specify scan settings according to the original you want to scan
If necessary, specify scan settings according to the original you want to scan
For details, see Various Scan Settings.
![]() Specify the destination
Specify the destination
For details, see Specifying Scan to Folder Destinations.
![]() Press [Start]
Press [Start]
When scanning from the exposure glass
If you are scanning only one original, press the [
 ] key to send the scan file.
If you are scanning multiple originals, place them on the machine, and then press the [Start] key.
Repeat this step until all originals are scanned, and then press the [
 ] key.
When scanning from the ADF
Transmission starts immediately after originals are scanned.
![]()
To cancel a selected destination, press the [Clear/Stop] key.
To cancel scanning, press the [Clear/Stop] key. Check the information displayed in the dialog box, and then press any button.
After scan files are sent, the destination will be automatically cleared.
