Every paper tray is loaded in the same way.
In the following example procedure, paper is loaded into Tray 1.
![]()
|
![]()
Be sure to select the correct paper size and feed direction using the paper size dial on the tray. Otherwise, the machine might be damaged, or printing problems might occur.
![]() Pull out the paper tray carefully. Adjust the paper size dial to match the size and feed direction of the paper in the paper tray.
Pull out the paper tray carefully. Adjust the paper size dial to match the size and feed direction of the paper in the paper tray.
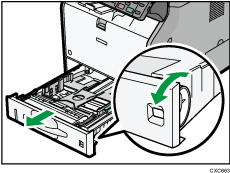
![]() Pull the tray carefully until it stops, lift the front side of the tray, and then pull it out of the machine.
Pull the tray carefully until it stops, lift the front side of the tray, and then pull it out of the machine.
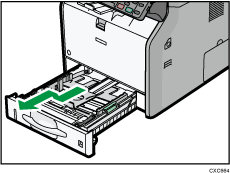
Place the tray on a flat surface.
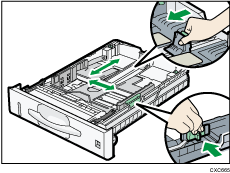
![]() Pinch the clip on the side paper guide and slide it to match the paper size. Pinch the end guide and slide it inward to match the standard size.
Pinch the clip on the side paper guide and slide it to match the paper size. Pinch the end guide and slide it inward to match the standard size.
![]() Fan the paper before loading it in the tray.
Fan the paper before loading it in the tray.
![]() Load the new paper stack print side down.
Load the new paper stack print side down.
Do not stack paper over the limit mark.
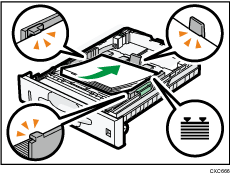
![]() Adjust the paper guides to close any gaps.
Adjust the paper guides to close any gaps.
Do not move paper loaded in the tray more than a few millimeters.
Moving the loaded paper excessively can cause damage to paper edges on the openings of the tray's lifting plate, resulting in sheets being folded or becoming jammed.
![]() Lift the front side of the tray, and then slide it into the machine carefully until it stops.
Lift the front side of the tray, and then slide it into the machine carefully until it stops.
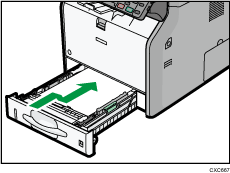
To avoid paper jams, make sure the tray is securely inserted.
When loading paper larger than A4![]() or 81/2 × 11
or 81/2 × 11![]() into Tray 1, see "Extending Tray 1", Paper Specifications and Adding Paper.
into Tray 1, see "Extending Tray 1", Paper Specifications and Adding Paper.
